Augmatic GRE User Manual
MIDI INSTRUMENT FOR : WINDOWS · MAC · IPAD · IPHONE | VST3 · CLAP · AUDIO UNIT · AUV3 · APP
English · Deutsch · Español · Français · Polski · Português · 中文
Introduction
Augmatic GRE generates evolving drum patterns and meldosies using proven musical algorithms. You can play endless rhythmic variations that naturally balance simplicity and complexity — without tedious manual programming.
Main Features
- SIX GENERATIVE CHANNELS — bass drum, snare, hi‑hat, plus accents.
- TOPOGRAPHIC ENGINE — plays morphable, evolving beats — based on the Mutable Instruments Grids Eurorack module.
- EUCLIDEAN ENGINE — plays evenly distributed rhythms.
- BLEND CONTROL — crossfades between Topographic and Euclidean engines.
- LINEAR DRUMMING — no two instruments play simultaneously.
- HARMONIC DRUMMING 2.0 — plays melodies, basslines, arpeggios based on chord from MIDI Input.
- VELOCITY BENDER — expressive, dynamic pulse.
- 4 KITS 2.0 — switch drum sounds instantly during playback.
- GROOVE TOOLS — swing, humanization, clock division, and timing shift.
2.0 — a new feature in Augmatic GRE version 2.0.
First Steps
VST3 & Standalone App — Windows and Mac
- Download Installer —
.exefor Windows or.pkgfor Mac. - Install — Run the Installer.
- Open your DAW — Ableton Live, Cubase, Bitwig, etc.
- Enter License Key and Activate — requires an internet connection and only needs to be done once, either in the standalone app or the plugin.
- Add Augmatic GRE as a VST3 instrument
- Route MIDI output to a drum instrument on another track
- Press Play — patterns generate and MIDI notes flow to your instrument
Audio Unit — Mac
- Download Installer —
.exefor Windows or.pkgfor Mac. - Install — Run the Installer.
- Open your DAW — Logic Pro, etc.
- Enter License Key and Activate — requires an internet connection and only needs to be done once, either in the standalone app or the plugin.
- Add Augmatic GRE as a MIDI effect
- Press Play — patterns generate and MIDI notes flow to your instrument
AUv3 & Standalone App — iPad, iPhone
- Download Augmatic GRE from the App Store
- Launch the standalone app once — this registers the AUv3 extension with the system
- Open your host — AUM, Cubasis, Drambo, Loopy Pro, etc.
- Add Augmatic GRE in a MIDI effect or MIDI source slot
- Enable Files App Access — Tap the blue ENABLE FILES APP ACCESS banner in the Augmatic GRE plugin window. This lets your presets show up in the Files app and share them with the standalone app. When the file picker opens, select the "Augmatic GRE" folder under On My iPad/iPhone. This is required only once. See screenshot below.
- Route MIDI "DRUM" output to a drum instrument
- Press Play — patterns generate and MIDI notes flow to your instrument
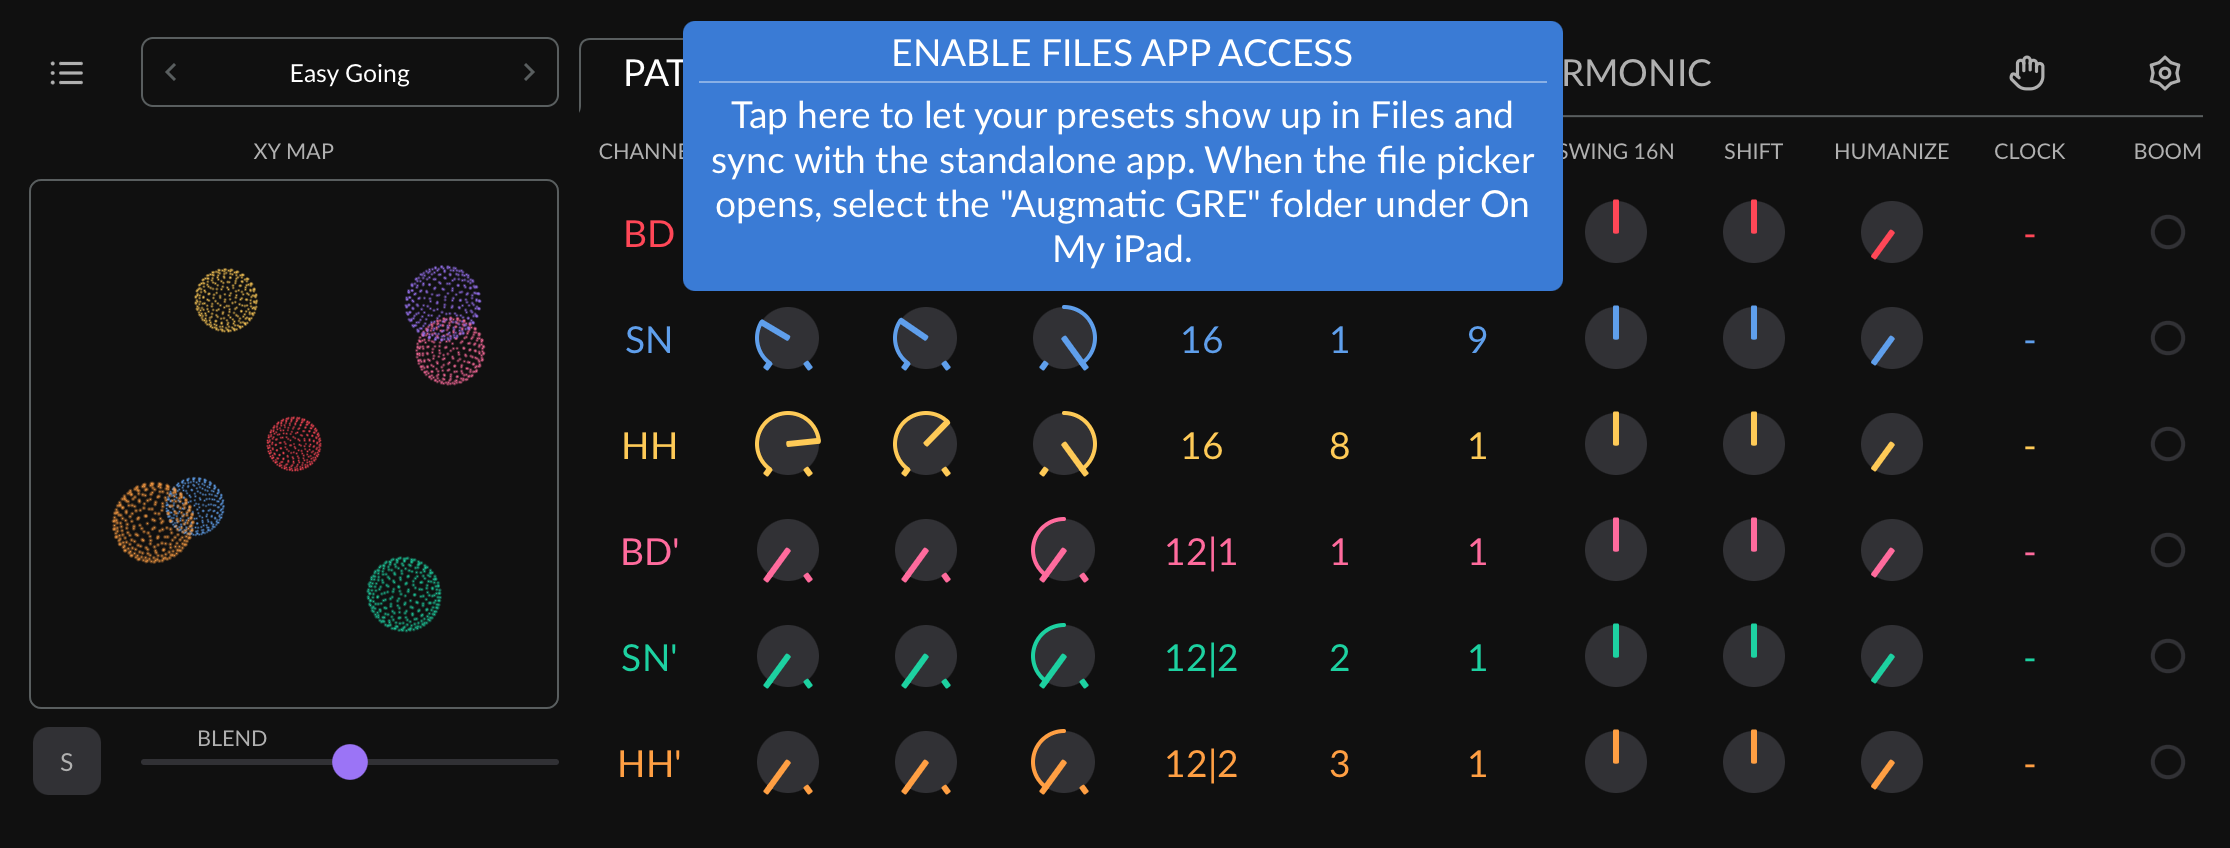
The banner disappears after you choose a folder, even a wrong one. If you selected a wrong folder, open SETTINGS and tap FIX IOS STORAGE PATH to choose again.
MIDI Outputs
Augmatic GRE is a MIDI effect — it doesn't make any sound on its own. It sends MIDI, so you need to route its output to a drum instrument which produces audio.
Augmatic GRE can output multiple independent MIDI streams at once. This is a unique feature that you probably haven't seen before. Read the instructions below carefully to make the most of GRE’s routing capabilities.
MIDI Setup Guides for Supported DAWs
Download demo DAW projects for MIDI setup examples:
MIDI Outputs in Windows and Mac DAW
Desktop MIDI plugins can send MIDI only to their own track. Even if a plugin uses multiple internal MIDI channels, all MIDI notes are sent through a single MIDI output. Augmatic GRE uses this output for its drums.
How, then, can melodies and arpeggios generated by the HARMONIC Tab 2.0 be sent to separate melodic instruments?
Augmatic GRE 2.0 comes with two lightweight companion plugins - HUB and RCV 2.0 - that let you route MIDI from its internal channels to different DAW tracks and instruments in your DAW.
HUB is a silent coordinator plugin. Load HUB on a separate track and leave it there. It automatically tracks all GRE and RCV instances, remembers channel assignments, and restores them when you open your project.
RCV is a MIDI‑receiver plugin. Load RCV on any track and route its MIDI output to an instrument on another track to play that instrument independently, just as you would with any other MIDI plugin. In the OUTPUT column of the HARMONIC Tab, you can assign internal GRE channels to RCVs and build a clean, modular routing setup.
The HUB and the RCVs can also be used to send drum patterns from each GRE channel to a different instrument, e.g. BD to a kick synth and SN to a sampler.
To configure routing for melodies, basslines and arpeggios, open the HARMONIC Tab → OUTPUT 2.0 column. For optional routing of drum channels open the KIT Tab → AUX OUT 2.0 column.
MIDI Outputs in iPad/iPhone DAW
AUv3 plugins on iPad and iPhone support multiple MIDI outputs, and that allows Augmatic GRE to send out MIDI to many instruments independently (HUB and RCV for Desktop DAWs are not required).
The main DRUMS 2.0 MIDI Port always sends out all drum channels from GRE on MIDI Channel 10. Use it to quickly play the full drum pattern. Additional six GRE 1..6 2.0 MIDI Ports can be used for routing of individual harmonic or drum channels to separate instruments.
To configure routing for melodies, basslines and arpeggios, open the HARMONIC Tab → OUTPUT 2.0 column. For optional routing of drum channels open the KIT Tab → AUX OUT 2.0 column.
MIDI Outputs in Standalone App
The STANDALONE APP on Windows 2.0, Mac, iPad and iPhone is always sending drum notes from all GRE channels to DRUMS Port on MIDI Channel 10. Use it to quickly play the drum pattern.
For maximum flexibility, GRE you can independently route any GRE channel to one of six virtual GRE 1..6 Ports 2.0. The six virtual GRE Ports can be used as inputs by other apps running in parallel on the OS. You can also send MIDI any MIDI Port available in the Operating System, for example, the MIDI driver of your sound card. MIDI Channels can also be assigned to support daisy‑chaining with MIDI Thru on a single port or cable going to more than several instruments, each on a different MIDI Channel.
On Windows, the virtual DRUMS, GRE 1..6 and GRE Input Ports need Windows 11 25H2 or newer. On an older Windows, the OUTPUT lists offer only the existing MIDI Ports of the Operating System, and SETTINGS shows GRE PORTS UNAVAILABLE. GRE PORTS SERVICE STUCK means that the Windows MIDI service stopped answering. Restart Windows to bring the Ports back.
To configure routing for melodies, basslines and arpeggios, open the HARMONIC Tab → OUTPUT 2.0 column. For optional routing of drum channels open the KIT Tab → AUX OUT 2.0 column.
Built-in Tutorial
Augmatic GRE includes an interactive tutorial that walks you through the most important features and at the same time, allows you to experiment with controls described in the instructions.
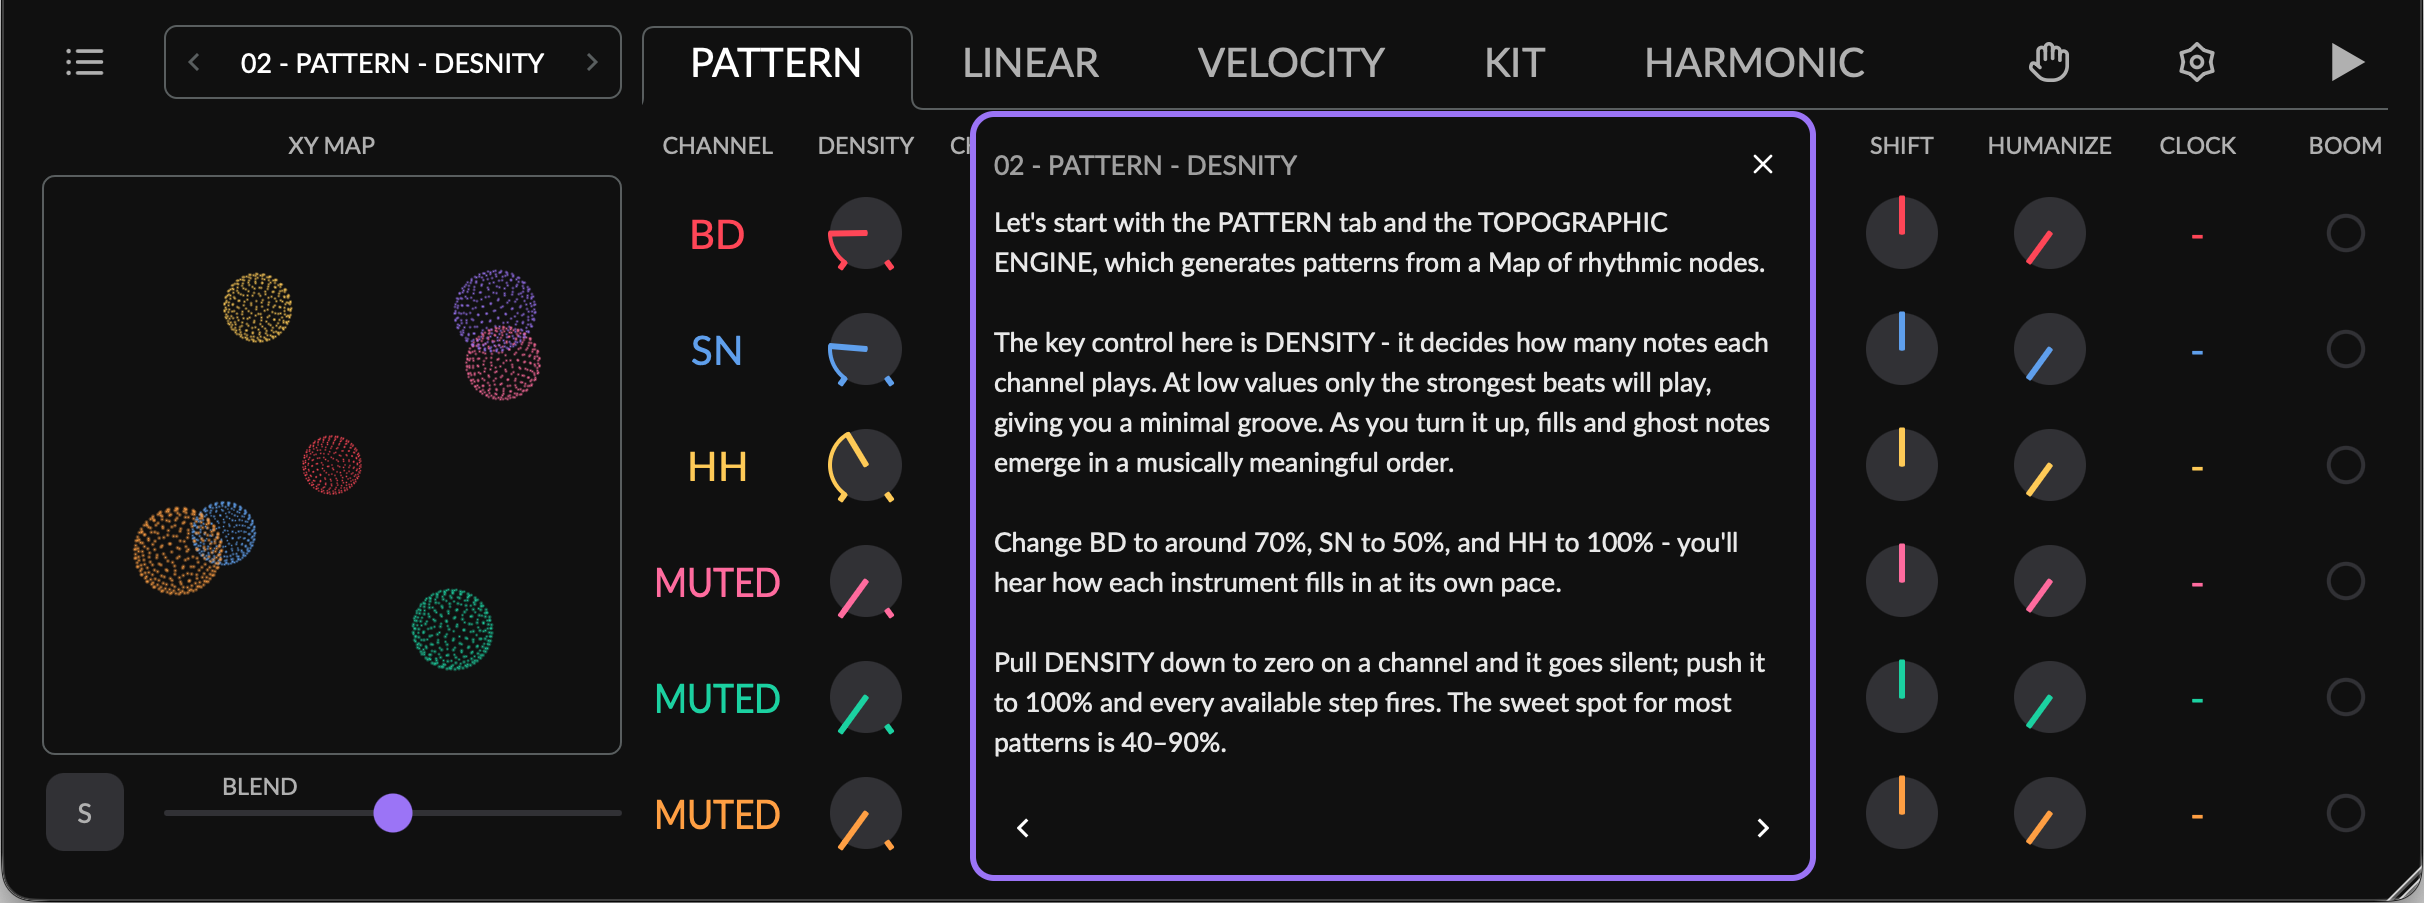
To open the build-in tutorial:
- Click SETTINGS icon →
BUILT-IN TUTORIAL. - Or: Click PRESET MENU → navigate to
[Factory] Tutorial Presetsfolder, load any preset to start from that topic.
The tutorial has < and > buttons at the bottom to step through tutorials in order. You can also use the < and > buttons in the PRESET MENU.
Interface Overview
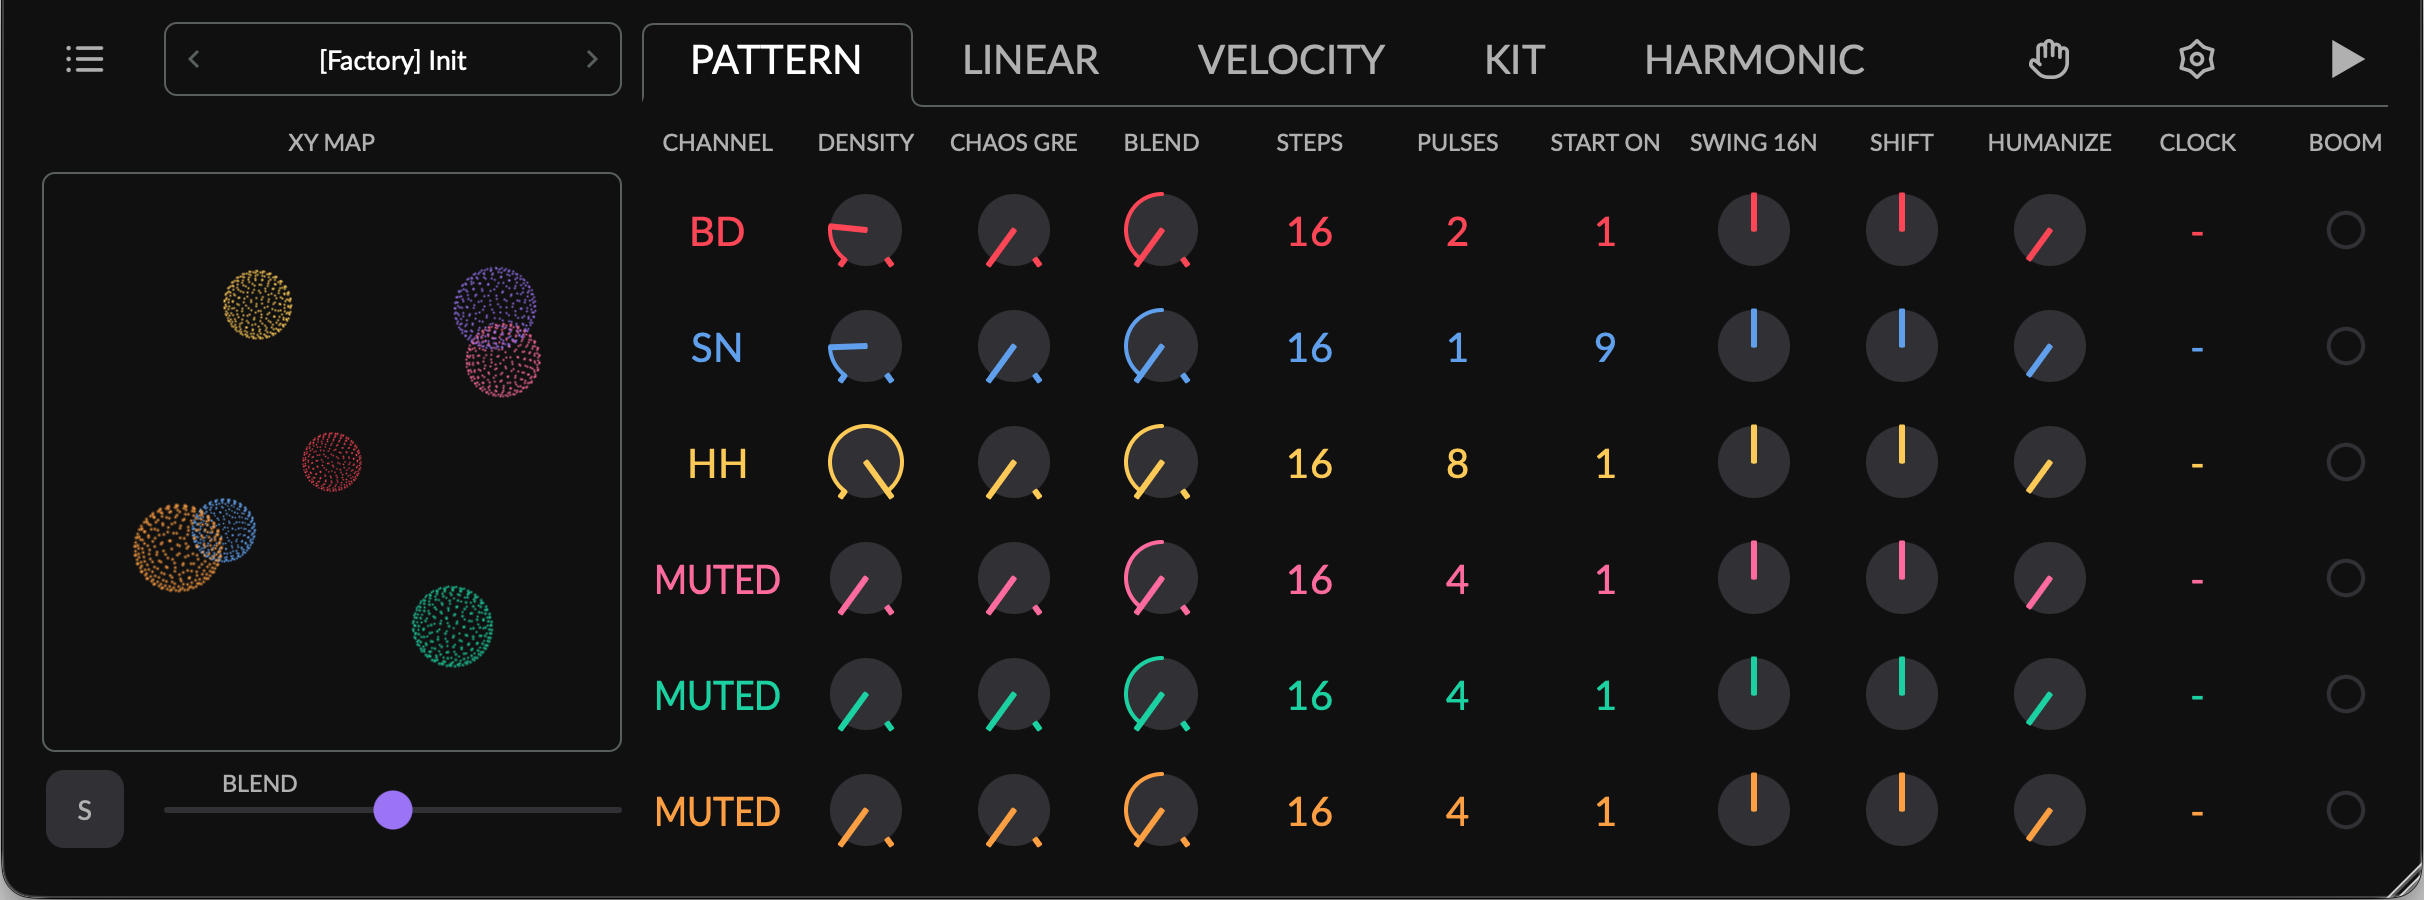
Top Row
/— toggles between XY MAP and MASTER SLIDERS view.- PRESET MENU — loads, saves, and navigates presets.
- PATTERN, LINEAR, VELOCITY, KIT, and HARMONIC tabs — this is where you make music with Augmatic GRE.
— holds notes from MIDI input for processing by HARMONIC tab.— brings up SETTINGS menu with application settings./— starts and stops playback — only in STANDALONE APP.
Left Panel
- XY MAP — morphs between TOPOGRAPHIC patterns.
- MASTER SLIDER below the XY MAP — controls selected parameter. You can change which one in SETTINGS.
Central Panel
- BD, SN, HH CHANNELS — main Bass Drum, Snare Drum and Hi Hat.
- BD', SN', HH' CHANNELS — accent versions of the main channels.
- LEDs on right side showing pulse generated by Augmatic GRE. Tap an LED pad to trigger that instrument.
Beat Monitor
BEAT MONITOR displays small animated dots next to parameters across all tabs during playback. It's a live visual probe wired to one specific stage of the signal chain — the pulse being generated, passing, or being blocked at that stage.
BEAT MONITOR helps you to see which drums and which steps are playing without reading MIDI or watching a DAW meter. Each dot carries the colour of its channel, so a glance at the grid tells you "BD and SN are hitting, HH is silent" or when the dot is dimmed: "probability is choking the events on HH channel". BEAT MONITOR can be turned on/off in SETTINGS.
Pattern Tab
PATTERN tab defines how drum patterns are generated.
Each of the six instrument channels includes its own set of controls across multiple columns. Augmatic GRE features two independent engines — TOPOGRAPHIC and EUCLIDEAN — each generating unique rhythmic patterns. To push creativity even further, you can combine both engines using the BLEND knob.
The PATTERN tab also provides GROOVE TOOLS: SWING, forward/backward SHIFT, HUMANIZE and CLOCK which lets you slow down or accelerate the pattern’s playback.
Topographic Engine
TOPOGRAPHIC engine plays pre-programmed patterns arranged in a map.
The engine is a port of the Mutable Instruments Grids Eurorack module. Each node of the map stores three distinct rhythmic layers — bass drum, snare, and hi-hat — designed to work together musically.
The TOPOGRAPHIC engine has 3 controls: XY MAP, DENSITY and CHAOS.
XY Map
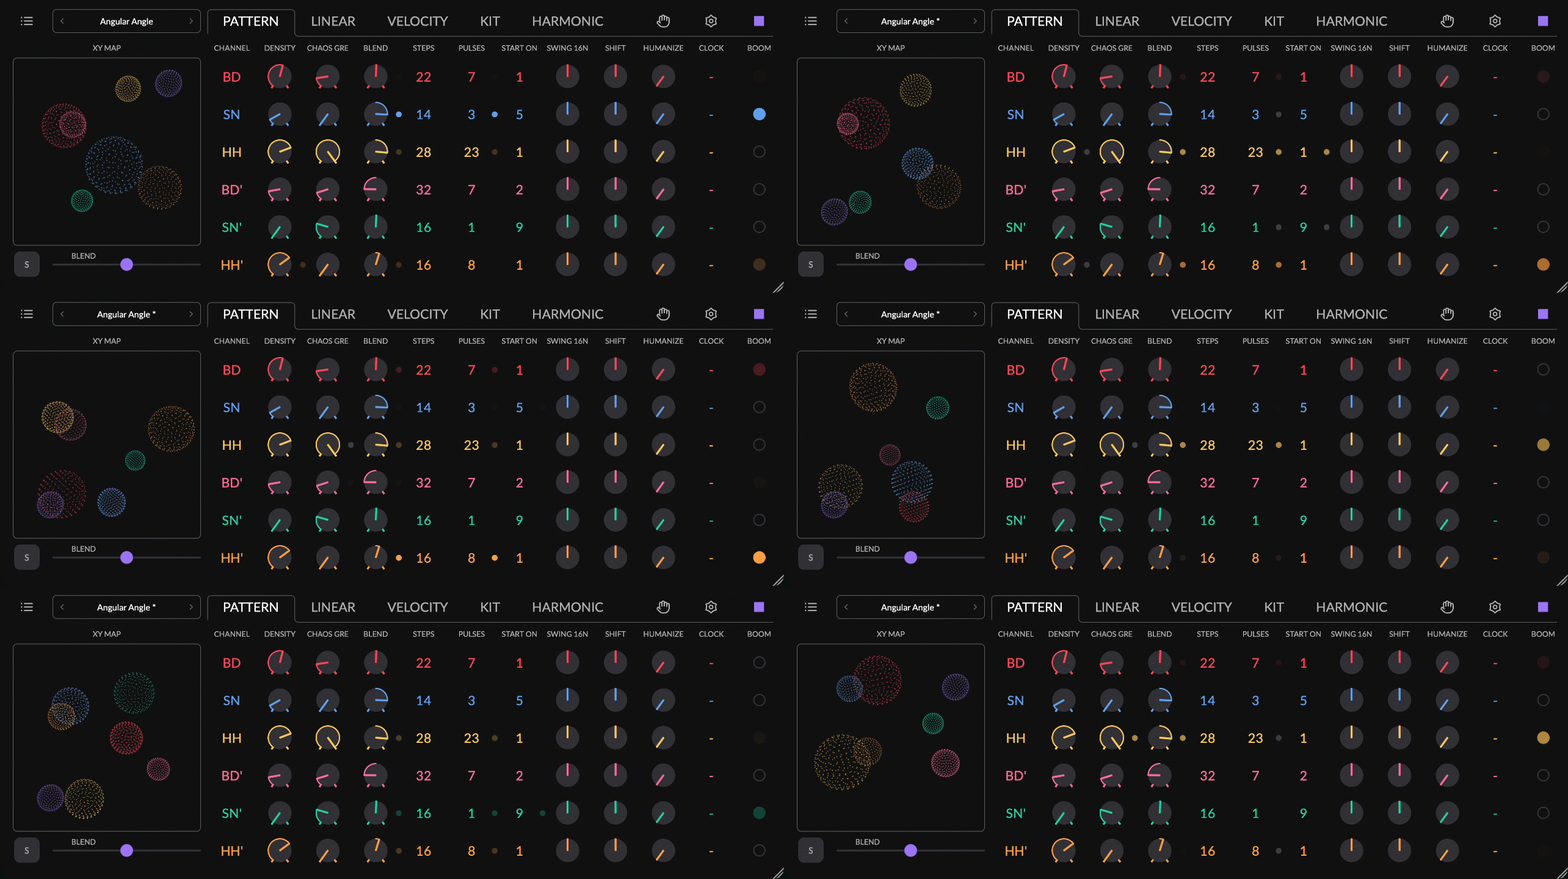
XY MAP changes the rhythmic character of all six drum channels simultaneously. All other controls on the PATTERN tab affect each drum channel independently.
When you move the XY coordinates, the engine smoothly blends between the four surrounding nodes using bilinear interpolation, creating an infinite continuum of rhythmic variations. The nodes are arranged in a curated musical topology, so adjacent positions morph between complementary drum styles rather than jumping abruptly.
The animation in the XY MAP can be changed or disabled in SETTINGS.
Main and Accent Channels
BD, SD, HH are the main channels which play the primary beat.
BD', SD', HH' are the accent channels which add ghost notes, rimshots, complementary rhythms, not duplicates.
The strongest beats play on the main channel; the weaker, in-between hits emerge on the accent channel.
Assign accent channels to different MIDI notes than their parent to trigger alternative drum sounds on the accent hits, for an example BD → bass drum, BD' → low tom.
In the original Mutable Instruments Grids hardware, accent outputs fire on the strongest hits in a pattern — those with an internal level above 192 (out of 255). To replicate this behavior in Augmatic GRE, set the accent channel's DENSITY to ≈25%. Lower values produce a sparser pattern; higher values include weaker hits and output a busier pattern than the original implementation.
You can rename each channel on KIT tab using the NOTE column 2.0, e.g. BD' → L TOM
Tip: Complementary Rhythms
The accent channels naturally produce the in-between hits that main channels skip.
- After you assign accent channels to different sounds — BD on kick, BD' on rimshot; SN on snare, SN' on clap — keep accent densities low (
10–25%) so they complement rather than compete. - Use the VELOCITY BENDER to modulate accent velocity over time
Density
DENSITY adds pulses which exceed it's threshold.
Each step in a pattern has a "level" value that represents how strongly that drum hit “wants” to play. Increasing DENSITY lowers the threshold and gradually adds hits in a musically meaningful order — the strongest beats appear first, then fills and ghost notes emerge as you push higher.
- Full left — no notes.
- Center — medium density. Roughly half the available pattern steps trigger.
- Full right — maximum density, all available steps trigger.
The DENSITY MASTER SLIDER controls all channel DENSITY knobs simultaneously.
Tip: Less is More
The sweet spot for most patterns is 40–90%.
- Set BD to around
70%, DN to50%, HH to100%. - Listen to how each instrument fills in at its own pace
- Dial back to taste — pull DENSITY to zero to silence a channel, push to
100%and every available step fires
Chaos
CHAOS adds controlled randomness to patterns, creating musical variations.
Impact of CHAOS control:
- Full left — mechanical precision, no variations.
- 20% — subtle humanization, living variation.
- Center — noticeable groove variation, surprises each bar.
- Full right — unpredictable, experimental.
CHAOS has 2 modes, which can be selected in SETTINGS:
- HARDWARE — Faithfull reproduction of the behaviour of the original Mutable Instruments Grids Eurorack module. Once per pattern cycle (2 bars at CLOCK x1), each drum gets a random amount of extra density. CHAOS never removes a hit. Patterns sound a little busier or plainer, but the beat stays recognisable. The pattern changes only at the start of a bar.
- GRE — CHAOS can add hits anywhere and remove hits anywhere, strong ones included. Low CHAOS outputs the pattern with ghost notes. Around halfway, the pattern starts to break up, off-pattern steps fire now and then. At maximum, the result is close to random, weighted toward the pattern.
The CHAOS MASTER SLIDER controls all channel CHAOS knobs simultaneously.
Tip: Controlled Randomness
- Changing CHAOS over a span of a few bars creates tension and release. For example: start with no CHAOS in bars 1-3, raise it to
50%in bar 4, then drop it back to zero at the start of bar 5. - Use DAW automation to repeat this tension‑and‑release effect across longer sections of the track.
- Use CHAOS MASTER SLIDER to control all channels simultaneously.
- As you push CHAOS up, watch the BEAT MONITOR dot next to the knob — it flashes whenever randomness adds a note.
Blend
BLEND is a central control of the PATTERN tab. It creates probability-based mix of pulses from TOPOGRAPHIC and EUCLIDEAN engines.
- Full left — 100% TOPOGRAPHIC Engine
- Center — Every note from each engine has the same 50/50 probability of passing or being blocked. Because this probability is uniform rather than weighted, an engine producing a sparse or delicate rhythm may become inaudible when another engine generates a much more intense pattern.
- Full right — 100% EUCLIDEAN Engine
BLEND allows you find a sweet spot between fully repeatable EUCLIDEAN backbone pattern and musically randomized TOPOGRAPHIC pattern. You can also use it to create breaks: quickly flip between 100% mechanial EUCLIDEAN and TOPOGRAPHIC and back to create a short variation.
BLEND MASTER SLIDER is especially useful for breaks, as it adjusts all channel BLEND knobs at once. You can also create a full track by slowly moving BLEND that will play sifferent rhythm at the beginning and the end of the track.
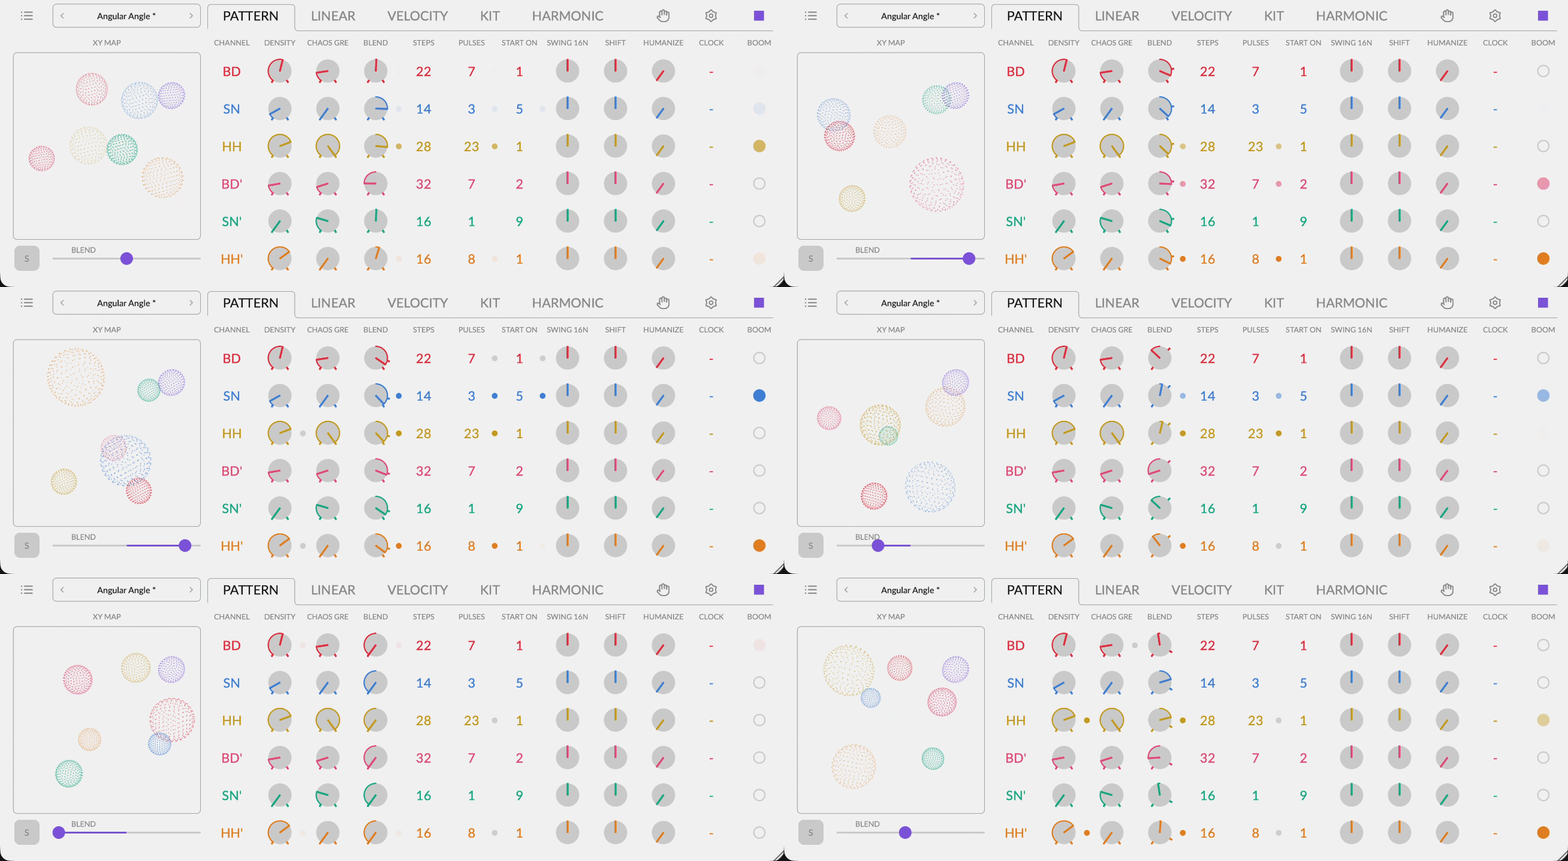
Tip: Best of Both Worlds
- Mix two engines: set BD BLEND to full left for natural kick patterns, and HH BLEND to full right for mechanical precision.
- Subtle life: set BLEND just slightly below full right — the TOPOGRAPHIC engine subtly replaces or adds notes, keeping the groove alive.
- Gradual transition: automate BLEND from full left to full right over several bars.
Euclidean Engine
EUCLIDEAN engine generates polyrhythmic patterns by distributing pulses evenly across steps.
EUCLIDEAN Engine always plays 100% predictable patterns using Toussaint/Bjorklund algorithm.
Visual examples of EUCLIDEAN rhythms:
16 STEPS | 4 PULSES | START ON 1:  X . . . X . . . X . . . X . . .
16 STEPS | 4 PULSES | START ON 3:  . . X . . . X . . . X . . . X .
 8 STEPS | 3 PULSES | START ON 1:  X . . X . . X .
19 STEPS | 1 PULSES | START ON 5:  . . . . X . . . . . . . . . . . . . .
Instead of drawing a pattern like this manually, you dial 4 parameters: STEPS, RESET, PULSES and START ON.
Steps
STEPS controls pattern length in 16th notes.
You can change the 16th note step duration using CLOCK — /2 divider will slow down the CLOCK 2-times and each step will be 8th note long.
Use MIRROR 2.0 to copy the value to all six channels at once, for an example set STEPS on all channels to 16. Press-and-hold any value for over one second to trigger the MIRROR feature.
Tip: Polyrhythmic Magic
Using different STEPS counts per channel creates patterns that evolve over many bars before repeating.
- Keep BD at
16STEPS - Set SN to
12STEPS - Set HH to
7STEPS - Because each channel loops at a different length, the combined pattern constantly shifts into complex, evolving polyrhythms
Combined with different Clock Divider ratios, this creates even more complex polyrhythmic textures.
Reset
RESET 2.0 restarts irregular patterns after a number of bars.
A pattern whose length doesn’t divide evenly into a single bar (for example 5, 14, or 21 steps) can be restarted from its first step after a chosen number of bars — 1, 2, 4, 8, 16, 32, 64 bars. This makes RESET a powerful tool for creating longer, evolving polyrhythmic structures.
RESET counts real song bars regardless of the channel's CLOCK value. If the current STEPS value fits evenly into one bar, RESET buttons are disabled.
The BEAT MONITOR dot in STEPS column flashes only when RESET restarts the pattern from the beginning.
Tip: Try out '[Factory] Euclidean Reset' Presets
Factory Presets play only BD, AN and HH to highlight the effect of RESET. As the pattern unfolds over several bars, it continuously changes while periodically returning to its original form. Pay attention to how RESET creates variation without losing a sense of structure.
Pulses
PULSES sets how many hits are spread evenly across the pattern's STEPS.
Turn it up for a busier part, down for a sparse one. It ranges from 0 (silent) to the current STEPS value — a hit on every step — and defaults to 4. Drop STEPS below the current PULSES and PULSES follows it down.
PULSES is automatically limited to STEPS range.
Tip: World Music Flavors
Odd pulse counts create instant world music flavors.
- Set BLEND to full right on the channels you want to experiment with
- Try
5PULSES in16STEPS on BD for a Latin rumba-like pattern - Change to
7PULSES for a dense, syncopated polyrhythm - Try different PULSE counts on BD, SN and HH independently.
Start On
START ON rotates the pattern so it begins on the step you choose.
You can move the whole rhythm without changing its shape. Leave it at 1 and the first hit lands on beat 1 — no shift. Raise it to N and the pattern slides right until its first hit falls on step N, handy for offsetting one channel against another or nudging an accent off the downbeat. It runs from 1 to the current STEPS and defaults to 1.
START ON is especially useful for snare drums, which almost never land on the first beat but typically hit on beats 3, 5, and similar off‑beats.
START ON is automatically limited to STEPS range.
Tip: Instant Syncopation
- Set a straight snare pattern: STEPS=
16, PULSES=2 - Change START ON to hear the snare land in unexpected places while the kick stays anchored
- Each START ON position gives a completely different groove character
- Watch the BEAT MONITOR dot — it flashes once per cycle to show where the EUCLIDEAN loop restarts
Popular Euclidean Rhythms
EUCLIDEAN rhythms can be found in traditional music worldwide:
| Steps | Pulses | Description |
|---|---|---|
8 | 3 | Tresillo — fundamental Cuban rhythm |
8 | 5 | Cinquillo — classic clave-like pattern |
12 | 5 | Son clave variation |
12 | 7 | Traditional bell pattern |
16 | 5 | Rumba clave stretched to 16 steps |
16 | 7 | Dense, complex polyrhythm |
13 | 5 | Classic African bell pattern |
16 | 9 | Modern electronic pattern |
[Factory] Euclidean folder contains many PRESETS with EUCLIDEAN rhythms; you might find them surprisingly musical and useful as starting points for your own experimentation with this engine.
Groove Tools
GROOVE TOOLS don’t change what pattern the engines play — they change how the pulses feel in time.
SWING, SHIFT, HUMANIZE, and CLOCK each act per channel, so every instrument keeps its own feel — one drum shuffles while another stays dead straight, one leans early while another drags behind.
Swing
SWING shifts some beats slightly later or earlier to create groovy feel.
SWING is based on the Roger Linn algorithm.
- Right knob position — delays the off-beat 16th notes, creating a classic shuffle/swing feel.
- Left knob posutuib — pulls the off-beat 16th notes earlier, creating a rushing feel.
Sometimes it may seem like SWING isn’t doing anything. Make sure your pattern actually contains 16th‑note events — straight 8th‑note rhythms won’t swing 16th notes because those subdivisions aren’t present. You can also change the SWING grid from the classic 16th note / 16N setting to more experimental options like 32NT, 32N, 16NT and 8NT in SETTINGS.
Tip: Shuffle Feel
- Set HH to play all 16 pulses — STEPS=
16, PULSES=16 - Apply positive SWING for classic shuffle, negative for a rushing, urgent feel
- Keep BD SWING at
0while swinging HH for that classic hip-hop groove.
Shift
SHIFT moves a channel’s pulses so they play slightly earlier or later in time.
SHIFTis using two different mechanisms depending on the knob side:
- Left — shifts the clock so notes are generated earlier. Here, SHIFT is placed at the start of the signal chain causing the events to trigger slightly ahead of their original timing.
- Center — span class="term">SHIFT is
OFF. - Right — delays notes. In this mode, SHIFT sits at the end of the signal chain and briefly holds each note in an output buffer before releasing it.
Tip: Flam Effects
SHIFT is perfect for creating a flam which is a grace‑note technique where two hits occur almost simultaneously, producing a thicker and more expressive attack.
- Use the same pattern on the SN and SN' channels.
- Then SHIFT the SN' to the left, so it triggers just a bit earlier than SN.
Humanize
HUMANIZE introduces small, random timing offsets, helping the pattern feel more natural and less mechanical.
HUMANIZE only delays — it never plays ahead because it lives at the very back of the signal chain. Combined it with SHIFT turned to the left, HUMANIZE will play ahead and after the downbeat.
Tip: The Human Touch
- Set HUMANIZE on all channels to
15–20%for warm, natural grooves. - For more character, use different amounts per channel — HH at
25%for loose feel, BD at5%for a tight foundation. - Higher values (
50%+) create loose, drunken timing.
Clock
CLOCK slows down or accelerates the playback speed of each channel independently.
CLOCK DIVIDER /N slows down the pattern, while CLOCK MULTIPLIER xN speeds it up. CLOCK values /1.5 and x1.5 introduce a triplet feel. High DIVIDER settings stretch the pattern across multiple bars, while high MULTIPLIER values produce rapid ratchets.
Tip: Speed Layers
- Set HH to
x1.5for a triplet-over-straight polyrhythm. - Set an accent channel to
/2for sparse accents every other bar. - Keep BD and SN at
OFF(normal) as the rhythmic anchor.
Beat Monitor
BEAT MONITOR on PATTERN is displaying five dots per channel row:
- DENSITY dot — flashes in the channel's color when the TOPOGRAPHIC engine generates a note from density alone. Flashes in dimmed color when BLEND blocks the pulse.
- CHAOS dot — flashes in channel color when a note fires only because chaos randomization pushed the value over the threshold. Without chaos, this step would have been silent — highlighting exactly where randomness is contributing to the pattern. Flashes in dimmed color when BLEND blocks the pulse.
- BLEND dot — lights up in the channel’s color whenever a note wins the engine‑merge and passes through the BLEND gate — from either the TOPOGRAPHIC or EUCLIDEAN engine. The dot stays off on any step where no note makes it through.
- PULSES dot — flashes in channel color when the EUCLIDEAN engine generates a note at this step. Flashes in dimmed color when BLEND blocks the pulse.
- START ON dot — flashes on the first step of the EUCLIDEAN cycle, showing the beginning of the EUCKIDEAN loop.
Pattern Tab Parameters
| Parameter | Range | Default | DAW automation |
|---|---|---|---|
| MAP X (global) | 0–255 | N/A | Yes |
| MAP Y (global) | 0–255 | N/A | Yes |
| DENSITY | 0–255 | 0 | Yes |
| CHAOS | 0–127 | 0 | Yes |
| BLEND | 0.0–1.0 (0 = Grids, 1 = Euclidean) | 0.0 | Yes |
| STEPS | 2–32 | 16 | Yes |
| RESET | OFF / 1 / 2 / 4 / 8 / 16 / 32 / 64 bars | OFF | Yes |
| PULSES | 0–32 | 4 | Yes |
| START ON | 1–32 | 1 | Yes |
| SWING | −99 to +99 (0.1 resolution) | 0 | Yes |
| SHIFT | 0–126 (0.1 resolution; 63 = centre / OFF) | 63 | Yes |
| HUMANIZE | 0–127 (0.1 resolution) | 0 | Yes |
| CLOCK | 23 ratios — DIVIDER: /1.5, /2, /2.5, /3, /4, /5, /6, /7, /8, /9, /10; MULTIPLIER: x1.5, x2, x2.5, x3, x4, x5, x6, x7, x8, x9, x10. (Plus one ratio for OFF=x1) | x1 | Yes |
Linear Tab
LINEAR tab determines which channels' pulses pass through when multiple channels hit at the same time. It's a drumming technique where no two instruments play simultaneously, producing clean single‑stroke patterns.
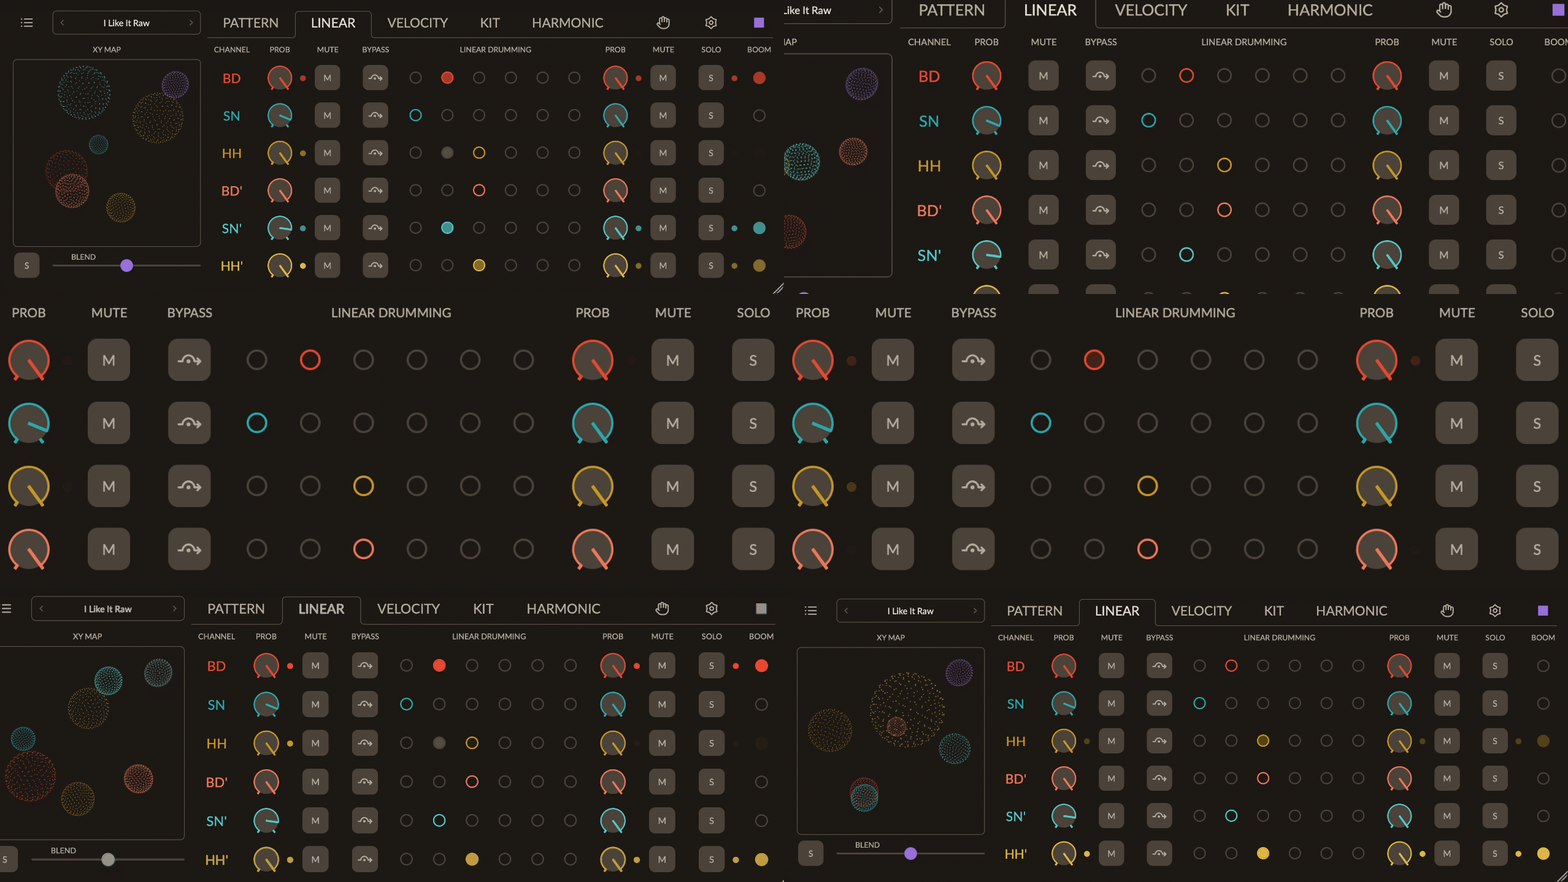
The LINEAR contains following controls: PROB and MUTE before (pre) and after (post) LINEAR DRUMMING matrix, BYPASS of the matrix, LINEAR DRUMMING matrix and SOLO.
Probability Pre / Post
PROB knobs randomly filter drum pulses.
From 0% — no pulses pass — through 50% — roughly half of the pulses are randomly removed — to 100% — all pulses pass. The PRE and POST controls have noticeably different effects on how the matrix behaves and what you hear:
- PROB PRE (on the left) — filters notes before LINEAR DRUMMING matrix. Any notes removed at this stage behave as if they never existed, allowing other channels with lower priority to naturally fill the gaps.
- PROB POST (on the right) — filters notes after LINEAR DRUMMING matrix. This creates intentional gaps in the pattern; whenever a higher‑priority channel would have played, its removed note leaves a space that adds tension and rhythmic pull.
Change of PROB PRE & POST can dramatically reshape the pattern, producing musical and often striking shifts such as build‑ups, breakdowns, returns to the main groove, and even outro‑style reductions.
Tip: Organic Gaps
- Lower BD → PROB PRE to
60–75% - Gaps get filled organically by other instruments through the priority matrix
- Great for evolving, generative patterns that never feel static.
Tip: Breakbeat Stutter
- Set all channels to
50%PROB POST. - Random holes appear in the groove for a stuttering, breakbeat-like feel.
- Unlike PROB PRE, these gaps stay empty, creating rhythmic breathing space and anticipation.
Mute Pre / Post
MUTE buttons instantly silence channels.
Similarly to PROB, MUTE offers both PRE (before) and POST (after the LINEAR DRUMMING the matrix) buttons. MUTE essentially acts like instantly flipping PROB to 0% creating the same dramatic effect on how the matrix processes the pattern.
Bypass
BYPASS 2.0 skips the LINEAR DRUMMING matrix entirely, so the channel won’t block other channels and won’t be blocked by them.
For example, you can set the hi‑hat to BYPASS so it plays continuously, while using the LINEAR DRUMMING matrix for BD and SN to ensure only one of those instruments triggers at a time.
Linear Drumming
LINEAR DRUMMING matrix controls which channels play or get blocked when multiple channels trigger drum pulses simultaneously.
LINEAR DRUMMING drumming technique works by assigning different priorities to each channel in the matrix.
- Dots on the left side of the matrix give that channel a higher priority.
- Each instrument has exactly one priority level.
- If two instruments share the same priority level, both play at the same time.
- If two channels with different priorities are triggered simultaneously, only the higher‑priority channel will play.
- The matrix can resolve six priority levels in real time, allowing each channel to have its own priority. This produces genuine linear‑drumming flow, eliminating simultaneous drum hits completely.
- Lower-priority instruments are muted for the duration set by LINEAR GRID (see Settings tab)
Tap a cell to set an instrument's priority. Tap and drag across cell rows to set priorities of multiple channels in one gesture. Double-tap a column to reset all channels to that priority level.
BEAT MONITOR — Simultaneous pulses which get muted appear as dimmed circles, while higher‑priority pulses flash in the channel’s color.
Tip: Clean Grooves
- Assign SN to Priority 1, BD to Priority 2, HH to Priority 3.
- Result: SN will always play, BD will be muted whenever it hits at the same time as SN, and HH will fill the remaining gaps.
- When notes collide, only the highest-priority instrument plays
- Lower-priority instruments are silenced for the grid duration
Solo
SOLO Isolates channels.
MUTE POST and SOLO are mutually exclusive functions.
Beat Monitor
The BEAT MONITOR on the LINEAR tab is invaluable for understanding why some channels play while others don’t. It visualizes each stage of the signal chain as notes pass through — or get blocked by — a higher‑priority channel:
- PROB PRE and PROB POST dots — flash in the instrument’s color when the note passes, and appear dimmed when low probability causes the pulse to be blocked.
- MUTE PRE and MUTE POST dots — flash in a dimmed color only when MUTE is
ON, giving a quick visual hint of what the button is doing. - LINEAR DRUMMING matrix - see detailed description above.
- SOLO dot — flashes in the instrument’s color when the note passes. When SOLO is
ONit dims the dots of all other channels.
Linear Tab Parameters
Velocity Tab
VELOCITY tab determines the output volume of each channel's MIDI notes.
The VELOCITY Tab has 4 controls: LEVEL, RANDOM, BYPASS and VELOCITY BENDER; the last one has a few more parameters.
IMPORTANT: Some instruments — such as simple one‑shot samplers — are not velocity‑sensitive, so changing the VELOCITY controls on this tab will not affect their volume. To make use of dynamic volume control, use a multi‑layer sampler or a velocity‑sensitive drum synthesizer.
Level
LEVEL assigns a fixed velocity value to all MIDI notes in the channel.
Setting LEVEL to 0 mutes the channel. Per the MIDI specification, velocity 0 means Note Off — no MIDI note is sent.
Random
RANDOM crossfades between the fixed LEVEL velocity and fully random velocity.
0%— Output velocity equals LEVEL exactly50%— Output velocity is halfway between LEVEL and a random0–127value100%— Output velocity is fully random (0–127), regardless of LEVEL setting
Tip: Dynamic Variation
- Set HH RANDOM to
30–40%for a natural, expressive hi-hat. - Keep BD and SN RANDOM at
5–10%for solid, consistent foundation.
Bypass
BYPASS skips VELOCITY BENDER and keeps its LEVEL velocity.
Velocity Bender
VELOCITY BENDER modulates note velocity using a bar-synchronized LFO to create rhytmic volume accents that evolve over time.
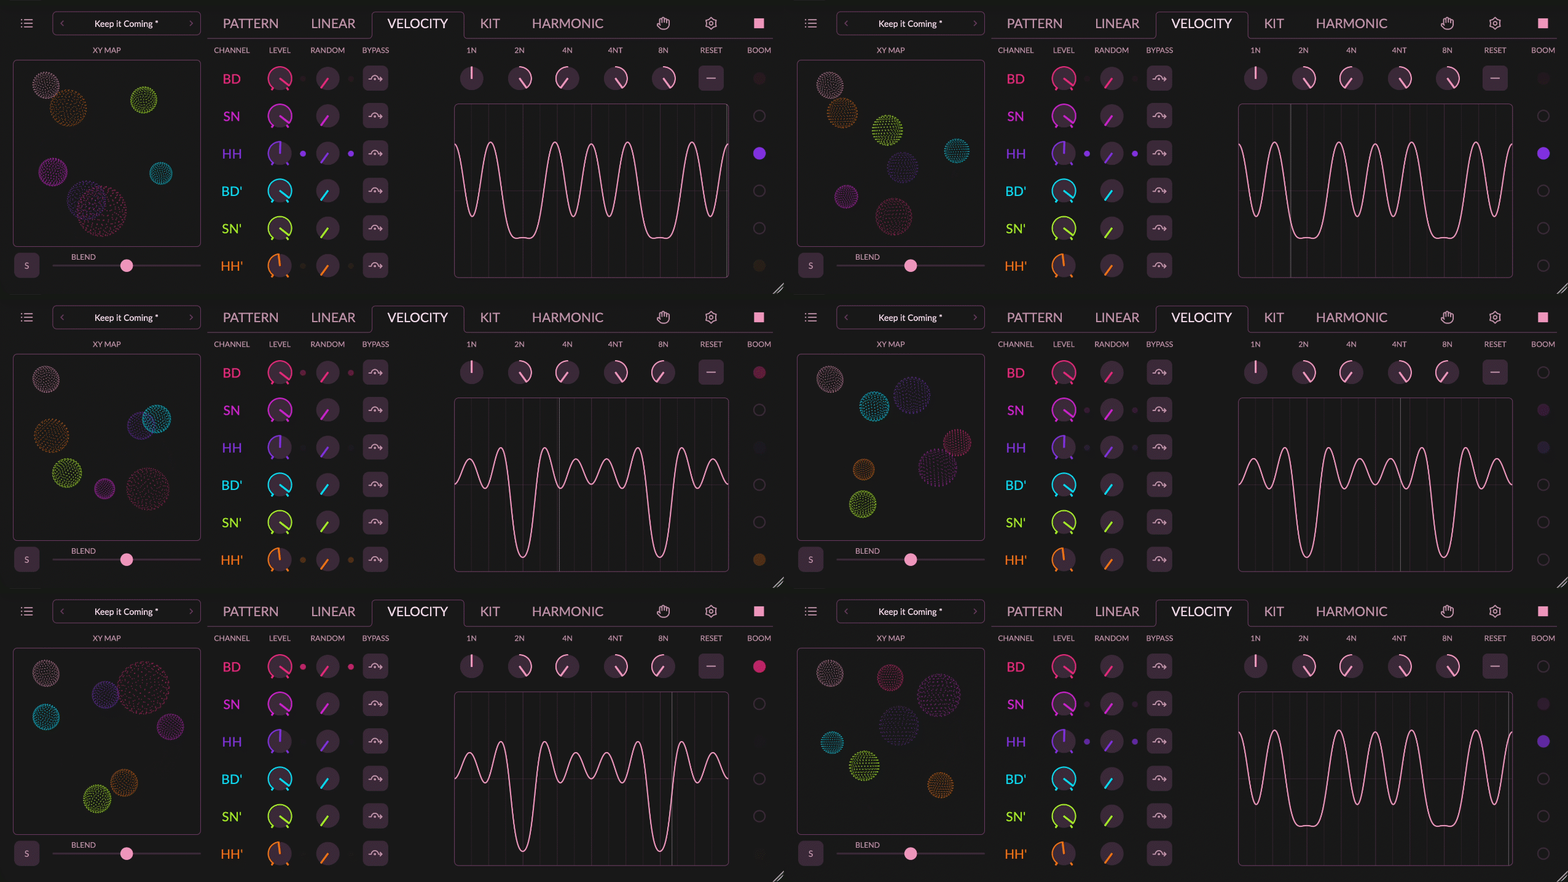
Five bipolar knobs control are blended into a single smooth LFO curve to control which beat divisions will play with higer or lower volume:
- 1N — Whole note — Slow one-bar velocity sweep cycle
- 2N — Half note — Slow, wide modulation over 2 beats
- 4N — Quarter note — Pulse-aligned modulation on every beat
- 4NT — Quarter-note triplet — Triplet feel — 3 cycles per 2 beats
- 8N — Eighth note — Fast modulation, twice per beat
Each knob ranges from -1.0 to +1.0 with 0.0 at center (no modulation). Positive values increase volumne, negative values reduce volume at that division.
- button — randomizes all five knobs.
- button — — resets all knobs to center (
0.0)
The VELOCITY BENDER is the final velocity processing stage before MIDI output. It multiplies the LEVEL velocity by the LFO value, so the modulation is proportional.
Tip: Rhythmic Breathing
- Start with the 4N and 8N knobs — these create the most rhythmic, danceable velocity patterns.
- Watch the waveform display to see the combined LFO shape in real time.
- Mix positive and negative values across divisions for complex, evolving dynamics.
- Use a multi‑layer sampler or a velocity‑responsive drum synth; VELOCITY BENDER can change the groove dramatically.
Beat Monitor
LEVEL and RANDOM columns provide visual feedback on the final velocity outcome:
- Instrument color — the note passed with a velocity greater than zero
- Dimmed — the note was blocked — final velocity =
0, which acts as a mute per the MIDI specification.
Velocity Tab Parameters
| Parameter | Range | Default | DAW automation |
|---|---|---|---|
| LEVEL | 0–127 | 120 | Yes |
| RANDOM | 0–100% | 0 | Yes |
| BYPASS | ON / OFF | OFF | Yes |
| BENDER 1N (global) | −1.0 to +1.0 (0.01 resolution) | 0.0 | Yes |
| BENDER 2N (global) | −1.0 to +1.0 (0.01 resolution) | 0.0 | Yes |
| BENDER 4N (global) | −1.0 to +1.0 (0.01 resolution) | 0.0 | Yes |
| BENDER 4NT (global) | −1.0 to +1.0 (0.01 resolution) | 0.0 | Yes |
| BENDER 8N (global) | −1.0 to +1.0 (0.01 resolution) | 0.0 | Yes |
Kit Tab
KIT tab defines how the six drum channels are routed to external tracks or instruments, and how each one should sound.
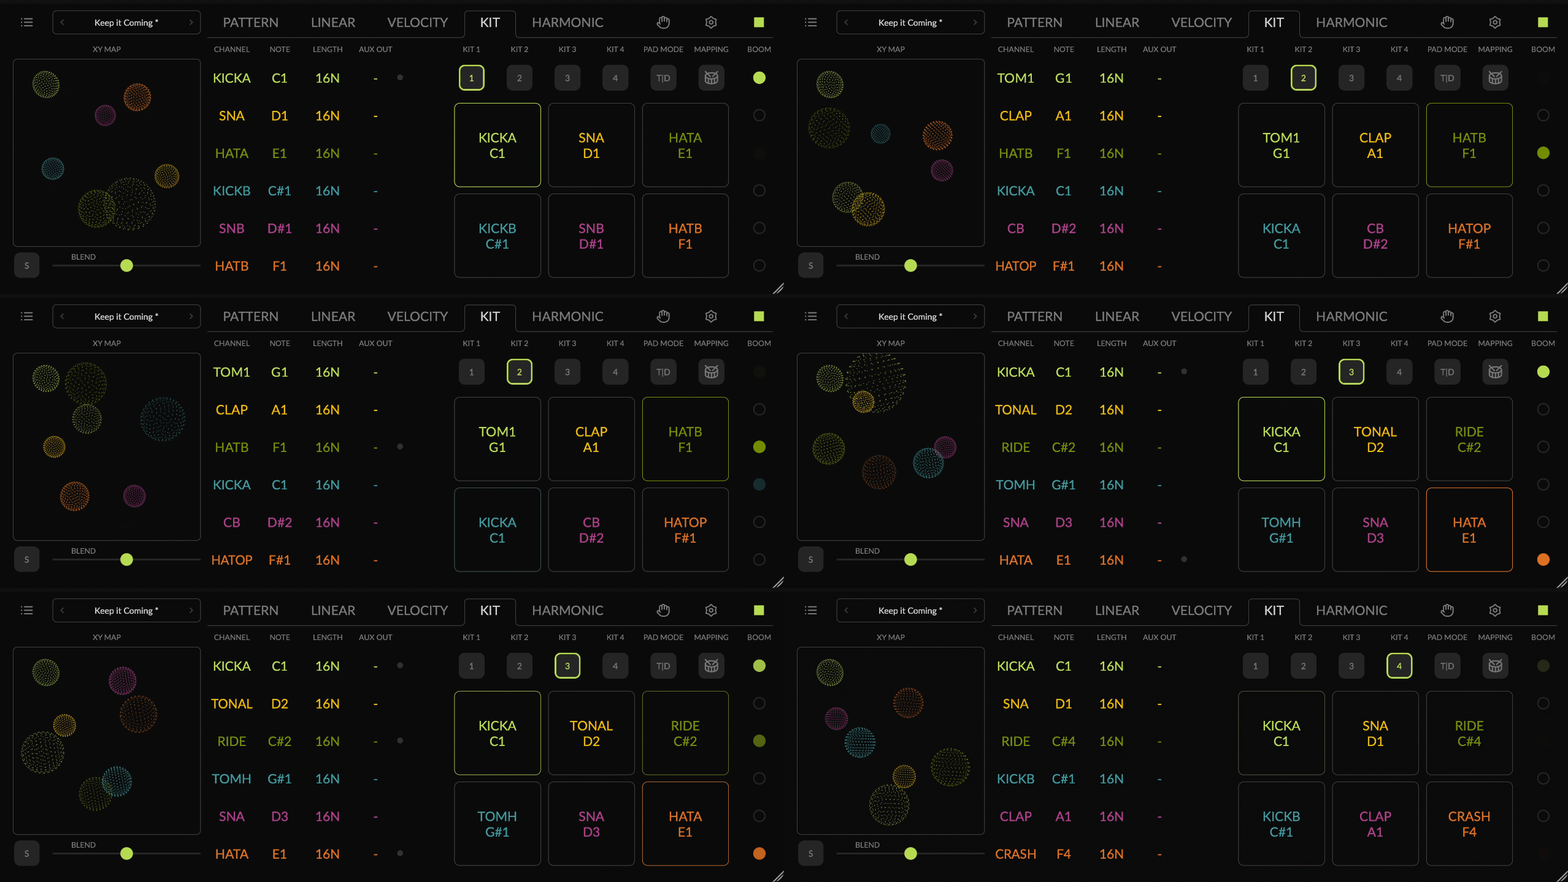
The KIT Tab has several controls: NOTE, LENGTH, AUX OUT, KIT 1...4, PAD MODE, MAPPING, and DRUM PADS.
Note
NOTE selects MIDI note that triggers the sound assigned to the channel.
NOTE overlay includes following controls:
- Keyboard with twelve pitches (
C,C#,Detc.) circles and an octave grid (-2..8) - — Auditions selected notes when enabled. Tapping a note in the keyboard/octave grid sends its MIDI note to the output, allowing you to quickly hear the corresponding sound.
- OFF — disables MIDI note output from the channel. This is useful when using the channel for HARMONIC sounds and you want to avoid triggering drum sounds.
- SHOW — switches the MIDI note display between note names (e.g.,
C#1) to note numbers (e.g.,37) as you prefer. - CHANNEL NAME — allows you to rename the channel (up to 6 characters). Because CHANNEL NAMES are saved within each KIT, you can label the same channel differently across KITS — for example HH' can be renamed to
OPEN Hin one KIT and toRIDEin another.
Length
LENGTH sets how long the MIDI note of a channel lasts — the time from Note On to Note Off.
Values run from 128N to 16 bars, plus triplet (e.g. 8NT) and dotted (e.g. 4ND) versions. Default 16N. Each KIT stores its own LENGTH per channel.
Many drum instruments are one‑shot: they play the full sample regardless of when Note Off arrives, so LENGTH has no audible effect. LENGTH matters for instruments that respond to note duration — gated synth drums, sustained samples, open hi‑hats that choke on Note Off.
A KIT switch never cuts short a note that is already playing — the note keeps the LENGTH it started with. Some hosts (e.g. Drambo) drop the shortest values; if you hear no sound, select 64N or longer.
Tip: Choked Hi‑Hat
- Set HH' NOTE to the open hi‑hat of a sampler that stops the sound on Note Off.
- Set HH' LENGTH to
32Nfor a short, tight hit, or8Nfor a longer open sound.
Kit Mapping
Most drum samplers and synths listen for drum sounds on different MIDI notes — one wants the kick on C1, another on B0.
The MAPPING button opens a browser of ready‑made KIT MAPPING files for many popular drum instruments. Select the file for your instrument and Augmatic GRE plays the correct notes immediately. The browser works like the PRESET BROWSER.
A KIT MAPPING file stores all four KITS — NOTE, LENGTH, NOTE OFF, AUX OUT and CHANNEL NAME of every channel — plus the ACTIVE KIT and the PAD MODE velocity settings.
Factory KIT MAPPING files contain no AUX OUT routing. Loading one resets AUX OUT to the platform default.
A user file saved with only one KIT still loads. KITS 2–4 receive a copy of KIT 1 with NOTE OFF on, so you can see at a glance which KITS are copies.
Tip: Your Own Mapping
- Load the factory KIT MAPPING for your instrument.
- Change NOTE, LENGTH and AUX OUT as needed.
- Save it under a new name — your routing is now saved with it.
Aux Out
AUX OUT 2.0 sends a copy of a drum channel to an additional MIDI destination.
All drum channels always play on MIDI Channel 10 of the main output — the DRUMS Port in the STANDALONE APP and on iPad/iPhone, or the plugin's own MIDI output in a desktop DAW. AUX OUT adds a second route per channel, for example BD to a kick synth and SN to a sampler.
The AUX OUT overlay depends on the platform:
- VST3, CLAP, Audio Unit —
OFFor one of 36 RCV plugins. DefaultOFF. - AUv3 iPad/iPhone — one of the GRE 1..6 MIDI Ports and a MIDI Channel. Default
1. - Standalone App — any MIDI Port of the operating system and a MIDI Channel. Default
1|10(Port GRE 1, MIDI Channel10).
Each KIT stores its own AUX OUT, so each KIT can play a different instrument. See MIDI OUTPUTS for the setup on each platform.
KIT 1..4
KIT 1..4 2.0 buttons switch between four drum kits during playback.
Many instruments offer several sounds for each drum‑kit piece — a snare may include hard and soft hits plus a rimshot, a hi‑hat may provide closed, open, shaft and bell articulations. With four KITS you switch the sound of the entire drum kit on the fly, much like a real drummer who moves from hi‑hat to ride between a verse and a chorus.
The active KIT drives the engines, and the NOTE, LENGTH and AUX OUT columns show its values. A switch during playback ends the notes of the previous KIT cleanly with Note Off.
The ACTIVE KIT selector is automatable, so you can automate a KIT change in your DAW. Of the KIT values, only KIT 1 NOTE, LENGTH and NOTE OFF are automatable.
Tip: Verse and Chorus
- Set up KIT 1 for the verse, with HH on the closed hi‑hat.
- Copy KIT 1 to KIT 2 with KIT MIRROR.
- In KIT 2, set HH to the ride.
- Automate ACTIVE KIT to switch to KIT 2 at the chorus.
Kit Mirror
KIT MIRROR 2.0 copies one KIT to another.
Press and hold a KIT button for ~1.5 s. The COPY KIT n TO KIT panel opens, with toggles for what to copy:
- NOTE — the note and its NOTE OFF state. On by default.
- CHANNEL NAME — off by default.
- LENGTH — on by default.
- AUX OUT — on by default.
Tap the destination KIT. Augmatic GRE copies the values and switches to that KIT. A short tap on a KIT button only selects the KIT.
Drum Pads
DRUM PADS 2.0 play the active KIT live, on top of the running pattern.
Six pads, one per channel. Use them to audition a KIT or to add fills without stopping playback.
- The inside of a pad lights when you tap it.
- The frame of a pad lights when the engine plays that channel (with BEAT MONITOR on in PAD MODE).
- A channel with NOTE OFF shows
-and its pad does not play.
Pad Mode
PAD MODE sets how a tap on a DRUM PAD turns into velocity.
Tap the PAD MODE cell next to the KIT buttons. Three velocity modes are available:
- FIXED — every tap sends the same velocity, set with the LEVEL knob. Default
120. - TOP-DOWN — velocity follows the vertical position of the tap, between MIN and MAX.
- CENTER-OUT — velocity follows the distance of the tap from the pad centre, between MIN and MAX.
The PAD MODE panel also has three toggles:
- TO HARMONIC — a tap also plays the HARMONIC chord or arpeggio of that channel.
- NOTE NAME — shows the MIDI note under the channel name.
- BEAT MONITOR — the pad frames light as the engine plays.
PAD MODE settings are global for all channels and are saved in the KIT MAPPING file.
Beat Monitor
BEAT MONITOR on the KIT tab displays two dots per channel. Both are alarms — they stay dark while notes pass, and flash dimmed only when a note does not leave:
- NOTE dot — flashes when NOTE OFF blocks the drum note. The HARMONIC notes of the channel still play.
- AUX OUT dot — flashes when AUX OUT has nowhere to go:
OFF, a missing MIDI Port or an unavailable RCV.
The main output is not affected — drum notes still play on the DRUMS Port or the plugin's MIDI output.
Kit Tab Parameters
| Parameter | Range | Default | DAW automation |
|---|---|---|---|
| ACTIVE KIT | KIT 1 / 2 / 3 / 4 | KIT 1 | Yes |
| NOTE (per kit · per channel) | 0–127 (MIDI note) | per channel — BD 36, SN 38, HH 42, BD' 44, SN' 39, HH' 48 | KIT 1 only |
| LENGTH (per kit · per channel) | 128N – 16 bars (+ triplet / dotted; 36 values) | 16N | KIT 1 only |
| NOTE OFF (per kit · per channel) | ON / OFF | OFF | KIT 1 only |
| AUX OUT (per kit · per channel) | OFF + RCV, Port / MIDI Channel (platform-dependent) | platform-dependent | No |
| CHANNEL NAME (per kit · per channel) | text, up to 6 characters | BD / SN / HH / BD' / SN' / HH' | No |
| PAD MODE (global) | FIXED / TOP-DOWN / CENTER-OUT | FIXED, velocity 120 | No |
KIT 1 only — only KIT 1 values are exposed to DAW automation. All KIT tab values are saved in the KIT MAPPING file, not in PRESETS.
Harmonic Tab
HARMONIC 2.0 tab turns drum pulses into chords, strums and arpeggios, using the notes you hold on the MIDI input.
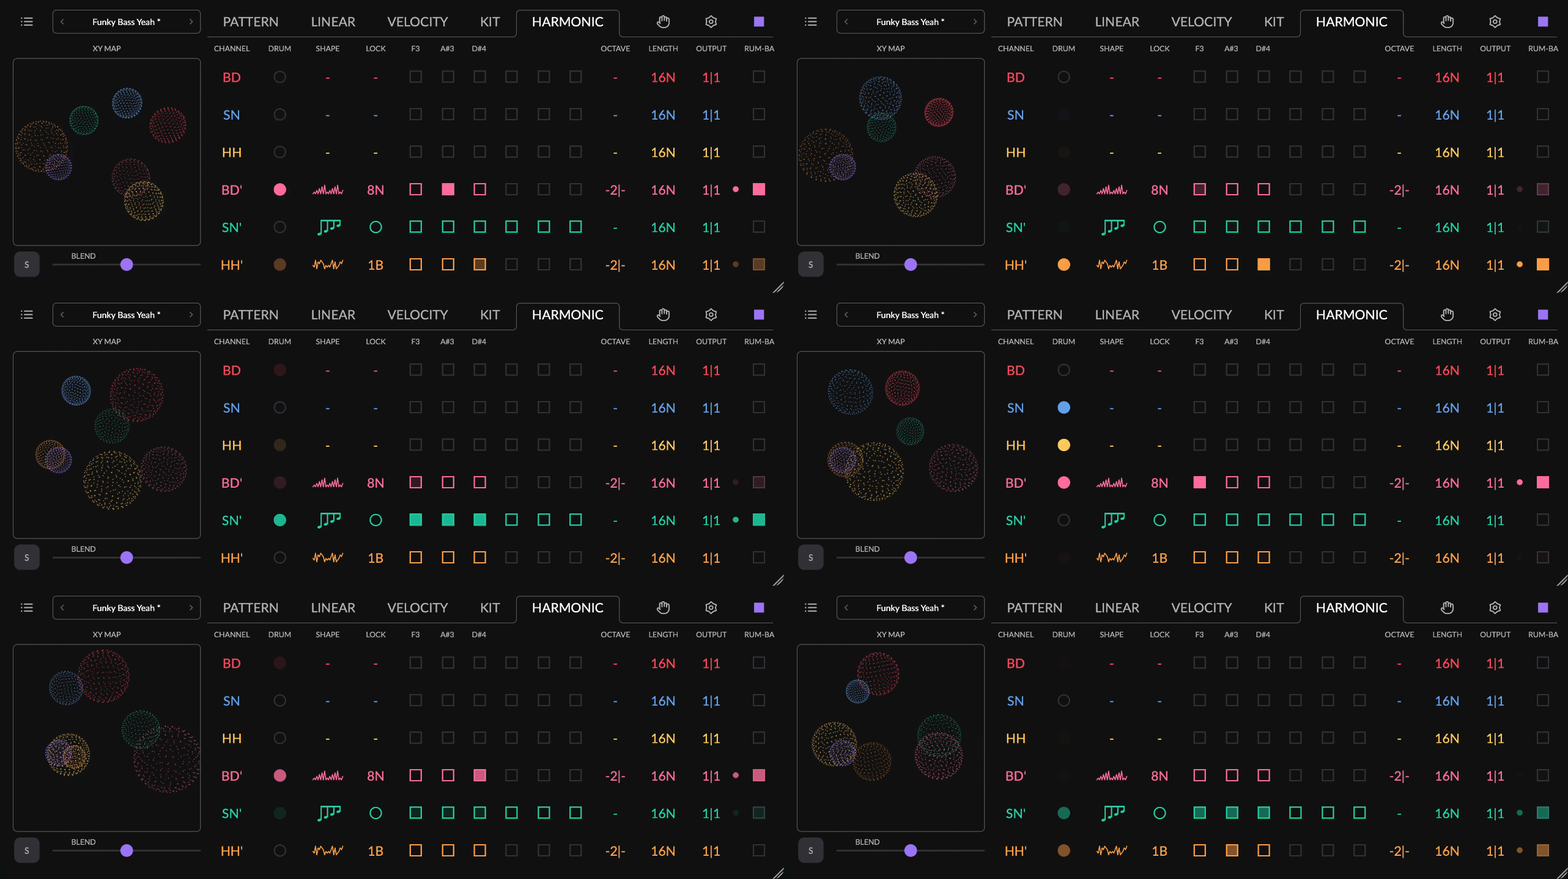
Hold a chord on a MIDI keyboard. Each drum pulse of a channel plays those notes — the rhythm of the drum pattern becomes the rhythm of the harmony. Held keys alone make no sound. Notes play only on a drum pulse, a tap on a DRUM PAD with TO HARMONIC on, or a click on the channel LED.
In a DAW, route your MIDI keyboard to the Augmatic GRE track. In the STANDALONE APP, select the keyboard in SETTINGS → MIDI IN.
The HARMONIC tab has the following controls per channel: SHAPE, LOCK, HARMONIC DRUMMING, OCTAVE, LENGTH and OUTPUT. The global HOLD button sits in the top row.
A channel plays drums and harmony at the same time. Set its KIT NOTE to OFF to play only harmony on that channel.
Shape
SHAPE selects how the held notes play when a drum pulse fires.
CHORD and STRUM play all selected notes on every pulse. The 30 arpeggio shapes and the 18 3-NOTE WALKS play one note at a time. OFF mutes the channel and keeps all its settings.
CHORD/ STRUM
 | CHORD — all held notes sound together as a single block chord on every pulse. |
 | STRUM — the same notes as CHORD, but rolled out quickly in time like a strummed guitar rather than played all at once. |
 | TIME knob sets STRUM direction and spread. Turn it left to roll from the bottom note up, turn it right to roll from the top note down; further from centre widens the inter-note gap, up to an eighth-note (follows tempo). Re-triggering mid-strum drops the previous roll's unplayed notes. The knob dims (but still turns) when STRUM is not selected. |
 | OFF — disables harmonic notes on this channel. |
ARPEGGIO — CLASSIC
 | UP — lowest note to highest, then repeats from the bottom. |
 | DOWN — highest note to lowest, then repeats from the top. |
 | UP DOWN INC (inclusive) — up to the top, then back down, with the top and bottom notes played twice at each turnaround. |
 | UP DOWN EXC (exclusive) — same up-then-down motion, but the top and bottom notes are played only once. |
 | DOWN UP INC (inclusive) — down to the bottom then back up, with the top and bottom notes played twice at each turnaround. |
 | DOWN UP EXC (exclusive) — same down-then-up motion, but the top and bottom notes are played only once. |
 | UP X2 — UP, but every note is played twice before moving on — a stuttering ascent. |
 | DOWN X2 — DOWN with every note played twice — a stuttering descent. |
ARPEGGIO — AS PLAYED
 | AS PLAYED — plays the chord tones in the order you pressed the keys, not by pitch, then loops. |
ARPEGGIO — OUTSIDE-INSIDE
These weave between the extremes of the chord and its middle.
 | OUT IN — alternates from the outside inward — lowest, highest, second-lowest, second-highest, … converging on the middle. |
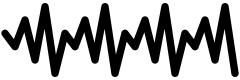 | IN OUT — the reverse — starts from the middle and spreads outward toward the extremes. |
 | PENDULUM — converges outside-to-inside, then diverges inside-to-outside, swinging back and forth like a pendulum. |
ARPEGGIO — PINKY-THUMB
Pedal-tone patterns, named for the fingers that would hold the pedal note on a keyboard. One fixed note keeps returning between the others.
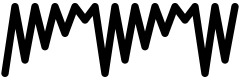 | PINKY UP — the top note (the “pinky”) pedals between the other notes as they ascend. |
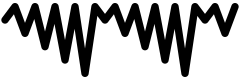 | PINKY DOWN — top note pedals between the others as they descend. |
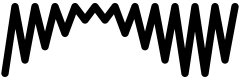 | PINKY UP DOWN — pinky-up followed by pinky-down — the top-anchored pattern that climbs then falls. |
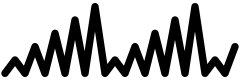 | THUMB UP — the bottom note (the “thumb”) pedals between the other notes as they ascend. |
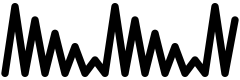 | THUMB DOWN — bottom note pedals between the others as they descend. |
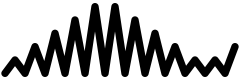 | THUMB UP DOWN — thumb-up followed by thumb-down — the bottom-anchored pattern that climbs then falls. |
ARPEGGIO — GENERATIVE
Randomised and evolving shapes, so the pattern shifts over time rather than repeating exactly.
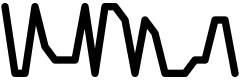 | RANDOM — every pulse picks a chord tone (and octave) completely at random. |
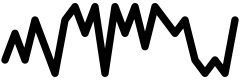 | RAND NO REPEAT — random, but never plays the same note twice in a row. |
 | RAND OTHER — plays every chord tone once in a random order, then reshuffles for the next pass. |
 | RAND 1 TIME — shuffles the chord once into a random order and then loops that order forever. |
 | BROWNIAN — a drunkard's walk that steps one note up or one note down from the last each pulse, bouncing off the top and bottom of the chord. |
 | FLOW — plays in your press-order (like AS PLAYED) but swaps two neighbouring notes each cycle, so the pattern slowly drifts while staying smooth. |
 | SHUFFLE WALK — systematically walks through every possible ordering of the chord, one full ordering per cycle, before starting over. |
 | SUBTLE CHAOS — a gentle, organically-evolving chaotic motion that drifts through notes and octaves without hard jumps. |
ARPEGGIO — CREATIVE
Rhythmic and interval-based shapes with their own character.
 | SKIP 1 — plays every other note first (1st, 3rd, 5th…), then fills in the ones it skipped, for a leaping, open sound. |
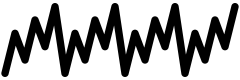 | SKIP 2 — zigzags between the lower and upper halves of the chord — a low note, then a high note, then the next low, next high. |
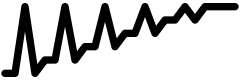 | DISCO — each chord tone is played twice, alternating with the top note between them, for a busy driving pattern with a repeated high accent. |
 | 3 AGAINST 2 — two interleaved streams running at different speeds, creating a three-against-two polyrhythm. |
3-Note Walks
Four-step loops over the three lowest notes the matrix passes: L is the lowest, M the middle and H the highest. Each pattern uses all three notes and repeats one of them on two neighbouring steps. With LOCK at 1B each step lasts one bar, so the loop repeats every four bars. Under a LOCK duration the step follows the song position, so bar 3 always plays the third letter, wherever playback starts.
Hold more than three notes and the shape uses the lowest three. Hold fewer and the letters fold down: C and E under LMHH play C E E E, and a single note plays on every step. With ARP RANGE above 1 the loop moves up one octave after each four steps, then wraps. The icon is a piano roll: one block per step, with H on the top row.
 | LLMH — low, low, middle, high. With C, E and G held: C C E G. |
 | LLHM — low, low, high, middle. With C, E and G held: C C G E. |
 | LMMH — low, middle, middle, high. With C, E and G held: C E E G. |
 | LHHM — low, high, high, middle. With C, E and G held: C G G E. |
 | LMHH — low, middle, high, high. With C, E and G held: C E G G. |
 | LHMM — low, high, middle, middle. With C, E and G held: C G E E. |
 | MLLH — middle, low, low, high. With C, E and G held: E C C G. |
 | HLLM — high, low, low, middle. With C, E and G held: G C C E. |
 | MLHH — middle, low, high, high. With C, E and G held: E C G G. |
 | HLMM — high, low, middle, middle. With C, E and G held: G C E E. |
 | MMLH — middle, middle, low, high. With C, E and G held: E E C G. |
 | HHLM — high, high, low, middle. With C, E and G held: G G C E. |
 | MHLL — middle, high, low, low. With C, E and G held: E G C C. |
 | HMLL — high, middle, low, low. With C, E and G held: G E C C. |
 | MMHL — middle, middle, high, low. With C, E and G held: E E G C. |
 | HHML — high, high, middle, low. With C, E and G held: G G E C. |
 | MHHL — middle, high, high, low. With C, E and G held: E G G C. |
 | HMML — high, middle, middle, low. With C, E and G held: G E E C. |
Lock
LOCK sets when an arpeggio moves to its next note.
- PULSE — the arpeggio moves one note on every drum pulse. The drum rhythm is the arpeggio rhythm.
- Duration —
64Nto16 bars, plus triplet and dotted. All pulses inside one window play the same note, and the arpeggio moves at the end of each window. The drums give the rhythm, LOCK gives the melody its own pace.
Visual example — held notes C, E, G, SHAPE UP:
LOCK PULSE:  pulses  x . . x . x . . x . . . x . x .
             notes   C     E   G     C         E   G
LOCK 2N:     pulses  x . x . . x . x | x . . x . . x . | x . x . . x . .
             notes   C   C     C   C | E     E     E   | G   G     G
LOCK affects arpeggios only. With CHORD and STRUM it is fixed at PULSE. A LOCK duration always follows the song position.
Tip: Slow Melody, Fast Drums
- Set HH to SHAPE UP and LOCK
1B. - Each hi‑hat pulse in a bar plays the same note; the melody moves once per bar.
- Set LOCK to PULSE to hear the difference.
Harmonic Drumming
HARMONIC DRUMMING matrix selects which of the held notes each channel plays.
Augmatic GRE sorts the held notes by pitch into six slots, H1 (lowest) to H6. Each channel row has six cells. A lit cell adds that slot to the notes of the channel. A row with no lit cells plays nothing.
Example — hold C, E and G: H1 = C, H2 = E, H3 = G. BD with only H1 lit plays C. HH with H1, H2 and H3 lit plays the full chord.
The matrix header shows the names of the held notes, also with the transport stopped — check the chord before you press Play.
Tip: Bassline on the Kick
- Light only H1 on the BD row, SHAPE CHORD.
- Set OCTAVE transpose to
-1or-2. - Route OUTPUT to a bass synth — the root note of your chord now follows every kick.
Hold
HOLD keeps the chord playing after you release the keys.
The button sits in the top row and is visible on every tab. With HOLD off, release of all keys clears the notes and the harmony stops. HOLD is global for all channels.
Octave
OCTAVE shifts the held notes by octaves and spreads them over several octaves.
The cell shows two values as <transpose>|<range>:
- TRANSPOSE —
-4to+4octaves. Shifts the held notes before anything else. - CHORD REPEAT / ARP RANGE —
1to8octaves. Stacks the chord upward in CHORD and STRUM, or sets the octave span of an arpeggio.
Both default to OFF — no change.
Length
LENGTH sets how long each harmonic note sustains.
From 128N to 16 bars, plus triplet and dotted. LENGTH is independent of LOCK. Some hosts (e.g. Drambo) drop the shortest values — 128N and 128NT. If you hear no sound, select 64N or longer.
Output
OUTPUT selects where the harmonic notes of a channel are sent.
Unlike drums, HARMONIC has no always‑on main output. A channel with OUTPUT OFF plays nothing.
- VST3, CLAP, Audio Unit — one of 36 RCV plugins.
- AUv3 iPad/iPhone — a PORT (GRE 1..6 or DRUMS) and a MIDI CHANNEL.
- Standalone App — any MIDI Port of the operating system and a MIDI CHANNEL.
Press and hold the PORT selector for ~1.5 s to copy the routing to all six channels. See MIDI OUTPUTS for the setup on each platform.
Beat Monitor
BEAT MONITOR on the HARMONIC tab shows each stage from drum pulse to note:
- DRUM dot — flashes when a drum pulse reaches the HARMONIC stage. It flashes even when NOTE OFF mutes the drum note.
- HARMONIC DRUMMING cells — flash for the slot that plays. With STRUM, the cells flash one after another.
- OUTPUT dot — flashes in the channel colour when a note leaves, dimmed when the route is dead:
OFF, a missing MIDI Port or an unavailable RCV. - LED — flashes when a note plays. Click it to audition the channel, also with the transport stopped.
A lit DRUM dot with a dark LED means no notes are held, or the HARMONIC DRUMMING row is empty.
Harmonic Tab Parameters
| Parameter | Range | Default | DAW automation |
|---|---|---|---|
| SHAPE | CHORD, STRUM, OFF + 30 arpeggio shapes + 18 3-note walks (51 total) | CHORD | Yes |
| TIME (STRUM spread) | −1.0 to +1.0 (0.001 resolution; direction & spread) | 0.0 | Yes |
| LOCK | PULSE + 64N – 16 bars (+ triplet / dotted; 34 values) | 2N | Yes |
| HARMONIC DRUMMING | H1–H6, each on / off | all off | Yes |
| TRANSPOSE | −4 to +4 octaves (0 = OFF) | OFF | Yes |
| CHORD REPEAT / ARP RANGE | 1–8 octaves (1 = OFF) | OFF | Yes |
| LENGTH | 128N – 16 bars (+ triplet / dotted; 36 values) | 16N | Yes |
| OUTPUT | OFF + per-channel destination (platform-dependent) | OFF | No |
| HOLD (global) | ON / OFF | OFF | Yes |
Every HARMONIC control is per channel and automatable, except HOLD (global) and OUTPUT, which is saved per channel outside DAW automation.
Master Sliders
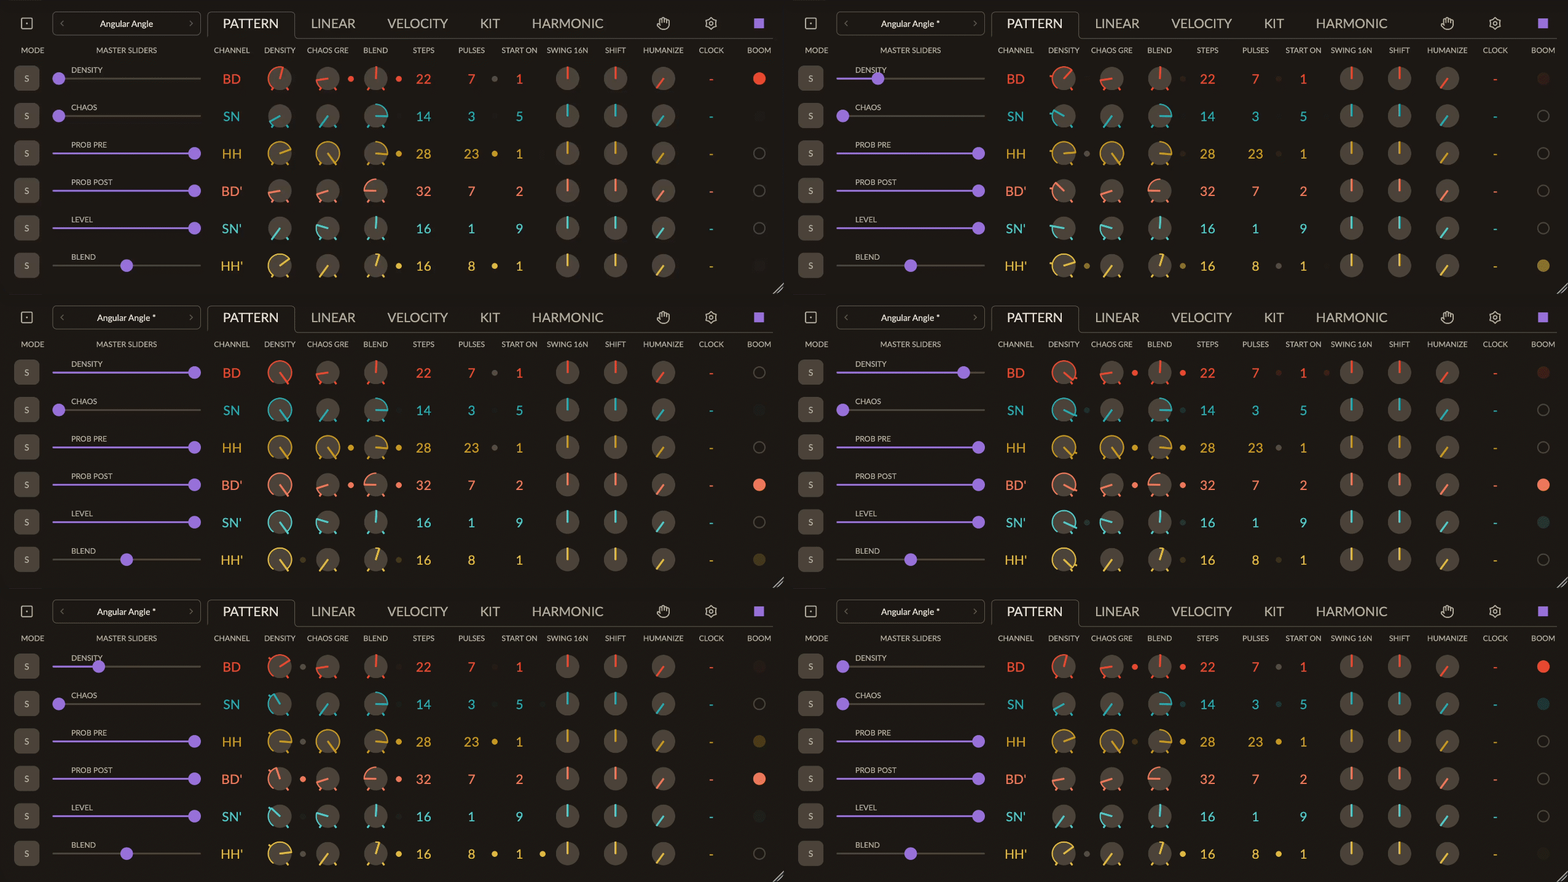
MASTER SLIDERS control one parameter on all six channels at once.
The button next to the XY MAP replaces the map with all six MASTER SLIDERS. One MASTER SLIDER is always visible below the XY MAP — select which one in SETTINGS → MASTER SLIDER.
Available Sliders
| Slider | Range | Default | Controls |
|---|---|---|---|
| DENSITY | 0–255 | 0 | Per-channel DENSITY knobs |
| CHAOS | 0–127 | 0 | Per-channel CHAOS knobs |
| BLEND | 0.0–1.0 | 0.5 | Per-channel BLEND knobs (bipolar) |
| PROB PRE | 0–100% | 100% | Per-channel PROB PRE knobs |
| PROB POST | 0–100% | 100% | Per-channel PROB POST knobs |
| LEVEL | 1–127 | 127 | Per-channel LEVEL knobs |
Hard & Soft Mode
The H/S button of each slider selects whether it overrides or scales the channel knobs.
- H (Hard) — all channel knobs take the value of the MASTER SLIDER. All channels show the same value.
- S (Soft) — each channel knob keeps its own value and scales with the MASTER SLIDER. This is the default.
Double‑click a slider to reset it to its default value and to Soft mode.
Limit Ticks
LIMIT TICKS show on each channel knob the range that the MASTER SLIDER allows.
- In Soft mode, the ticks mark the limit that the knob value cannot pass.
- In Hard mode, the ticks move to minimum and maximum — the full range is available.
- BLEND knobs show two ticks, floor and ceiling.
Turn LIMIT TICKS on/off in SETTINGS → LIMIT TICK.
Settings
SETTINGS holds the application settings of Augmatic GRE.
Click the icon in the top row. SETTINGS opens as a floating window with three columns.
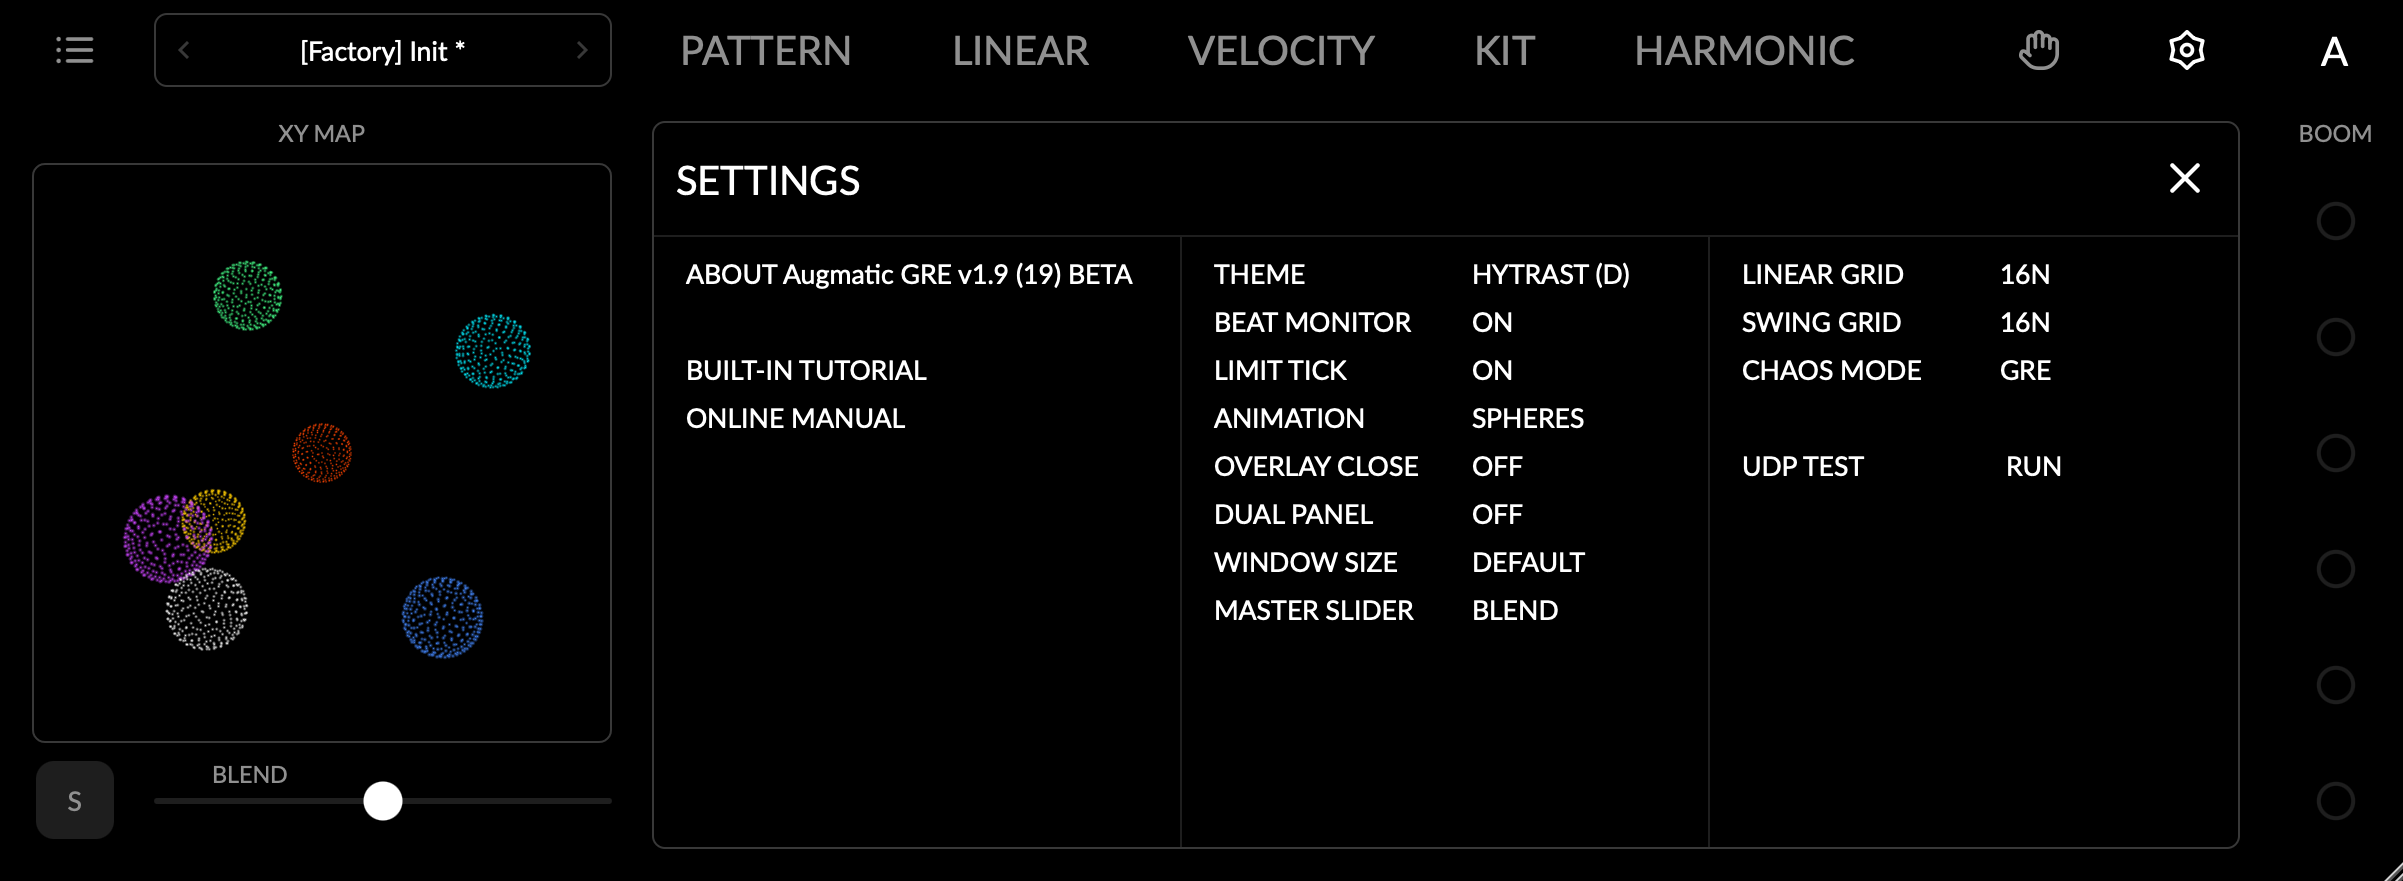
Version & Tutorials
- Version line — opens the ABOUT panel with the version and links to the online manual and the website.
- BUILT-IN TUTORIAL — opens the BUILT-IN TUTORIAL.
- ONLINE MANUAL — opens this manual.
- RATE ON APP STORE — iPad/iPhone only.
Display
- BEAT MONITOR — turns the BEAT MONITOR dots on/off on all tabs.
- LIMIT TICK — turns the LIMIT TICKS on/off.
- ANIMATION 2.0 — animation of the XY MAP:
OFF,RIPPLESorSPHERES. - OVERLAY CLOSE 2.0 —
ONcloses a PARAMETER OVERLAY after each pick.OFF(default) keeps it open for auditioning. - WINDOW SIZE —
DEFAULTresets the plugin window to its default size. Desktop only. - MASTER SLIDER — selects the MASTER SLIDER below the XY MAP.
Themes
THEME 2.0 changes the colours of Augmatic GRE.
Select one of many factory themes, the pinned DARK and LIGHT, or your own theme. A theme sets the colours of backgrounds, text, accents and channels. Each plugin instance keeps its own theme, saved with the project — useful to tell several instances apart.
To add your own theme, put an XML theme file in the Themes/User folder (see FILE STORAGE) and restart Augmatic GRE. A missing theme falls back to DARK.
Dual Panel
DUAL PANEL 2.0 shows a second tab below the first one.
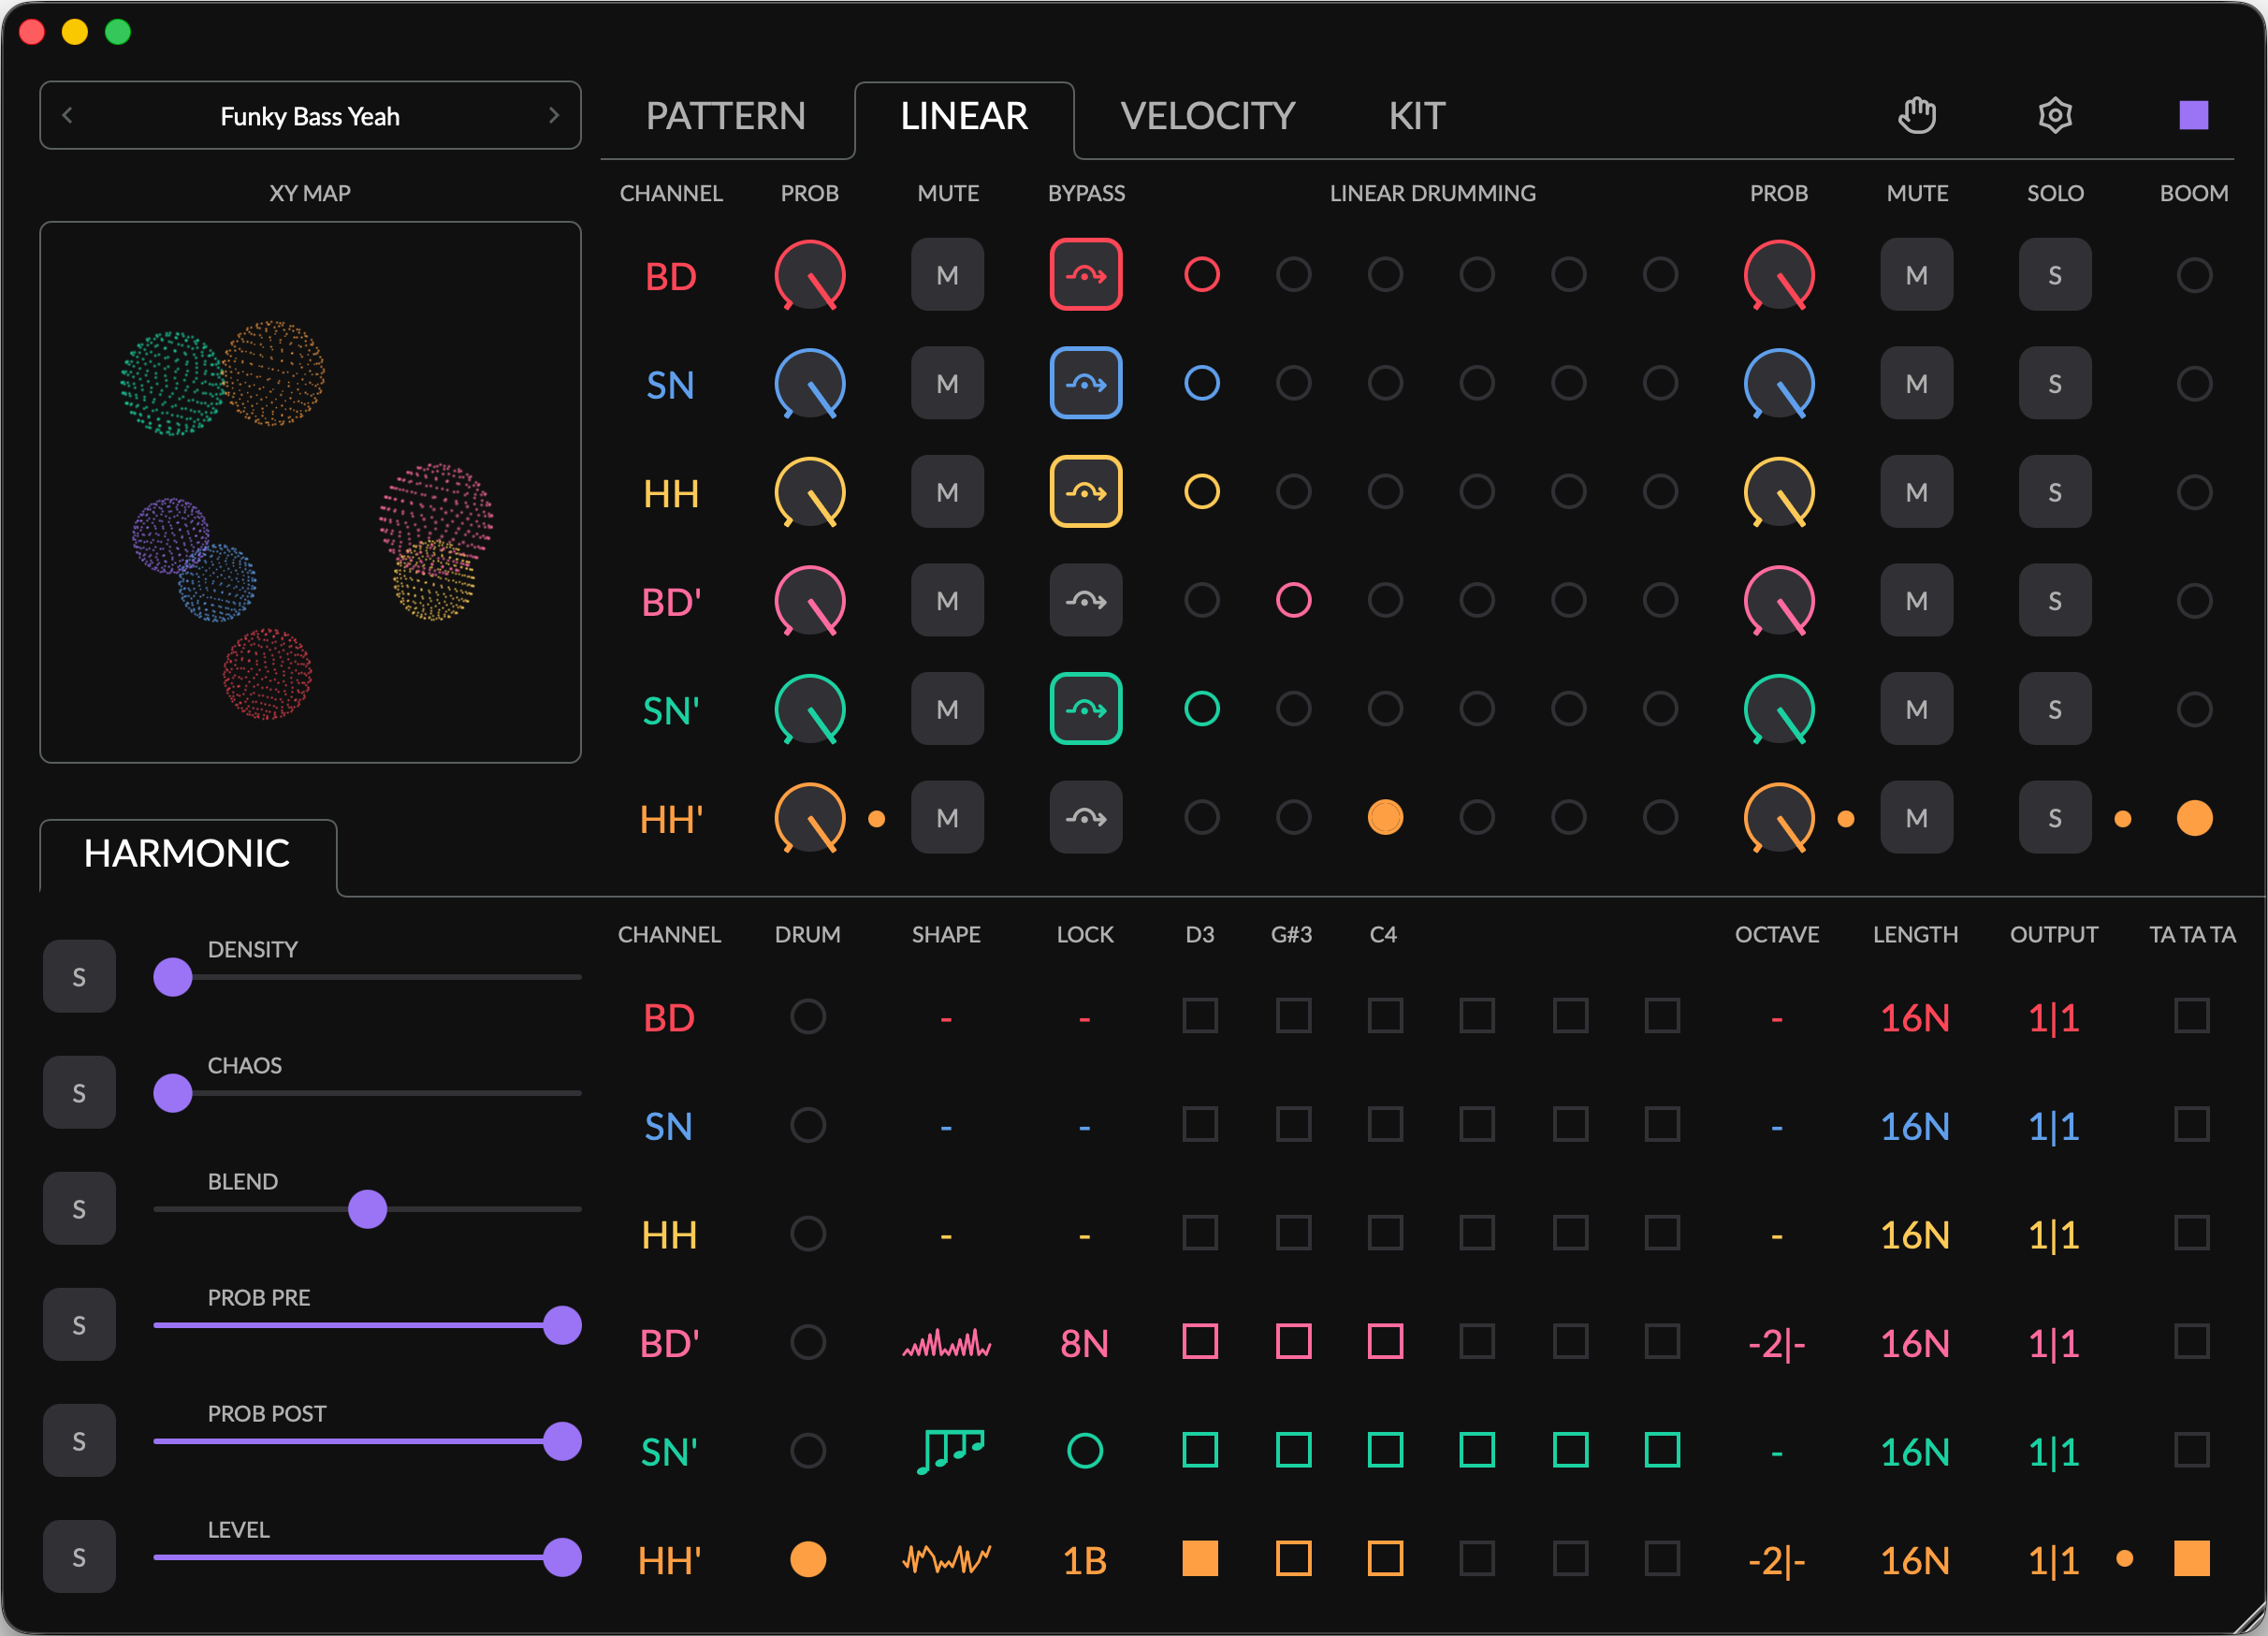
The window becomes taller and a lower panel opens with a fully interactive tab: PATTERN, LINEAR, VELOCITY, KIT or HARMONIC. OFF closes the panel. You can also change the lower tab from its own title. All six MASTER SLIDERS show on the lower left. Available on desktop and iPad, not on iPhone.
Engine
- LINEAR GRID — how long lower‑priority channels stay muted in the LINEAR DRUMMING matrix:
MIN,64N,32N,16N,8Nor4N. - SWING GRID 2.0 — the note division that SWING acts on:
32NT,32N,16NT,16N(default),8NTor8N. - CHAOS MODE —
HARDWAREorGRE, see CHAOS.
These settings are global, saved with the project, and not automatable.
MIDI In
Select the PORT and the CHANNEL (ALL or 1–16). STANDALONE APP only — in a DAW, the host routes MIDI to the plugin. The STANDALONE APP also shows the BPM of its internal clock here, 40–240.
UDP Test
UDP TEST 2.0 checks that Augmatic GRE can talk to the HUB and RCV plugins.
Click RUN. The result is PASSED or FAILED. On FAILED, a SEND DIAGNOSTIC TO SUPPORT link appears. Run the test inside the DAW where you use Augmatic GRE. Desktop plugins only.
Fix iOS Storage Path
iPad/iPhone only. If you selected a wrong folder at ENABLE FILES APP ACCESS, tap FIX IOS STORAGE PATH and select the Augmatic GRE folder again.
Parameter Overlays
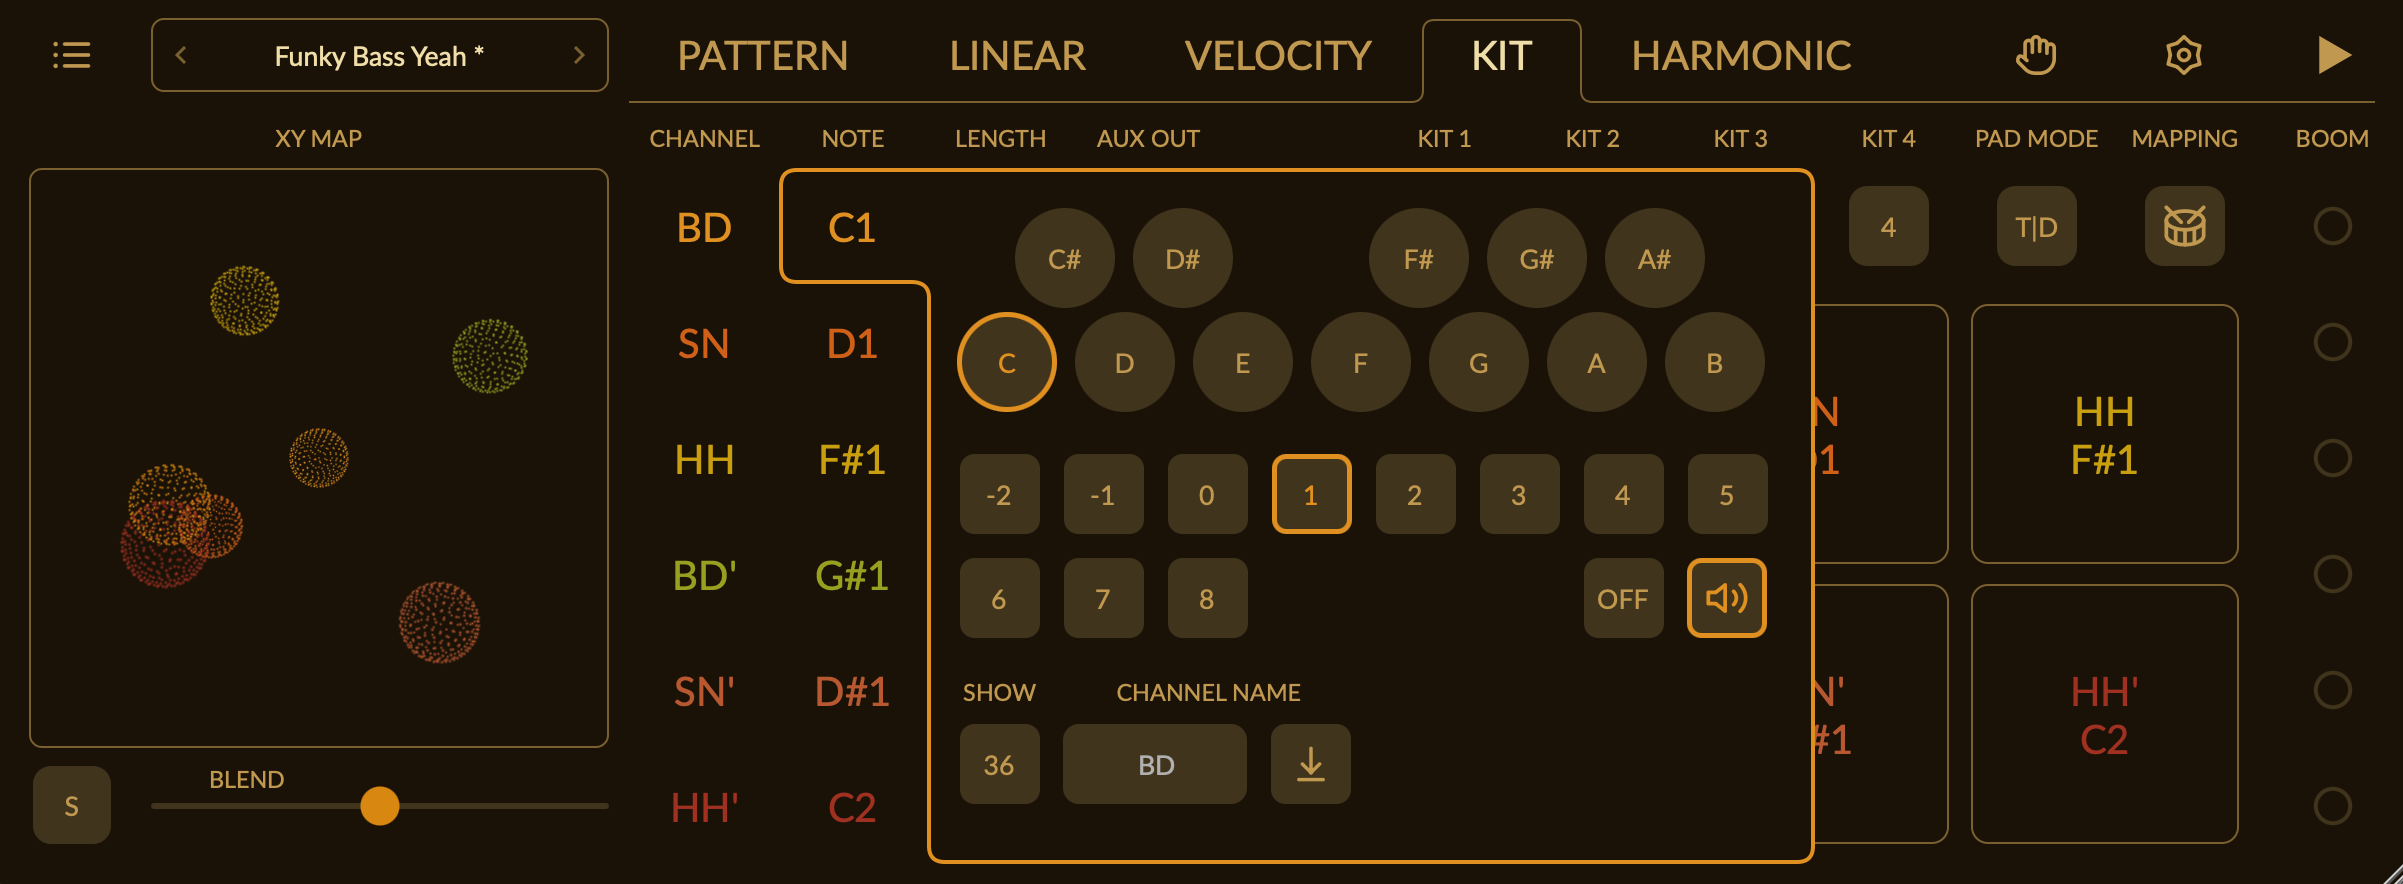
PARAMETER OVERLAYS show all values of a control at once in a pop‑up grid.
Tap a cell to open its overlay, then tap a value — it applies immediately. On a touch screen, a finger drag scrolls the grid without a pick. The overlay stays open so you can audition one value after another. Turn on OVERLAY CLOSE in SETTINGS to close it after each pick.
To close an overlay, tap its cell again, tap outside the panel or press Escape. While an overlay is open, it follows DAW automation of its value.
Overlays are used for:
- PATTERN — STEPS, PULSES, START ON, CLOCK.
- KIT — NOTE, LENGTH, AUX OUT.
- HARMONIC — SHAPE, LOCK, OCTAVE, LENGTH, OUTPUT.
Mirror
MIRROR 2.0 copies a value to all six channels at once.
Press and hold any value in a PARAMETER OVERLAY for ~1.5 s. The held cell and the other five rows flash twice in their channel colours to confirm the copy. A shorter press is a normal pick.
- In the STEPS overlay, the RESET buttons mirror separately.
- NOTE copies the note and its NOTE OFF state.
- OCTAVE copies transpose and range.
- AUX OUT and OUTPUT copy the full destination.
To copy a whole KIT, use KIT MIRROR.
Preset System
All KIT tab values live in KIT MAPPING files. A preset load never changes your drum notes or the ACTIVE KIT.
Preset Browser
Tap the PRESET MENU in the top row to open the browser. It has an action panel on the left, three folder columns and an info panel on the right.
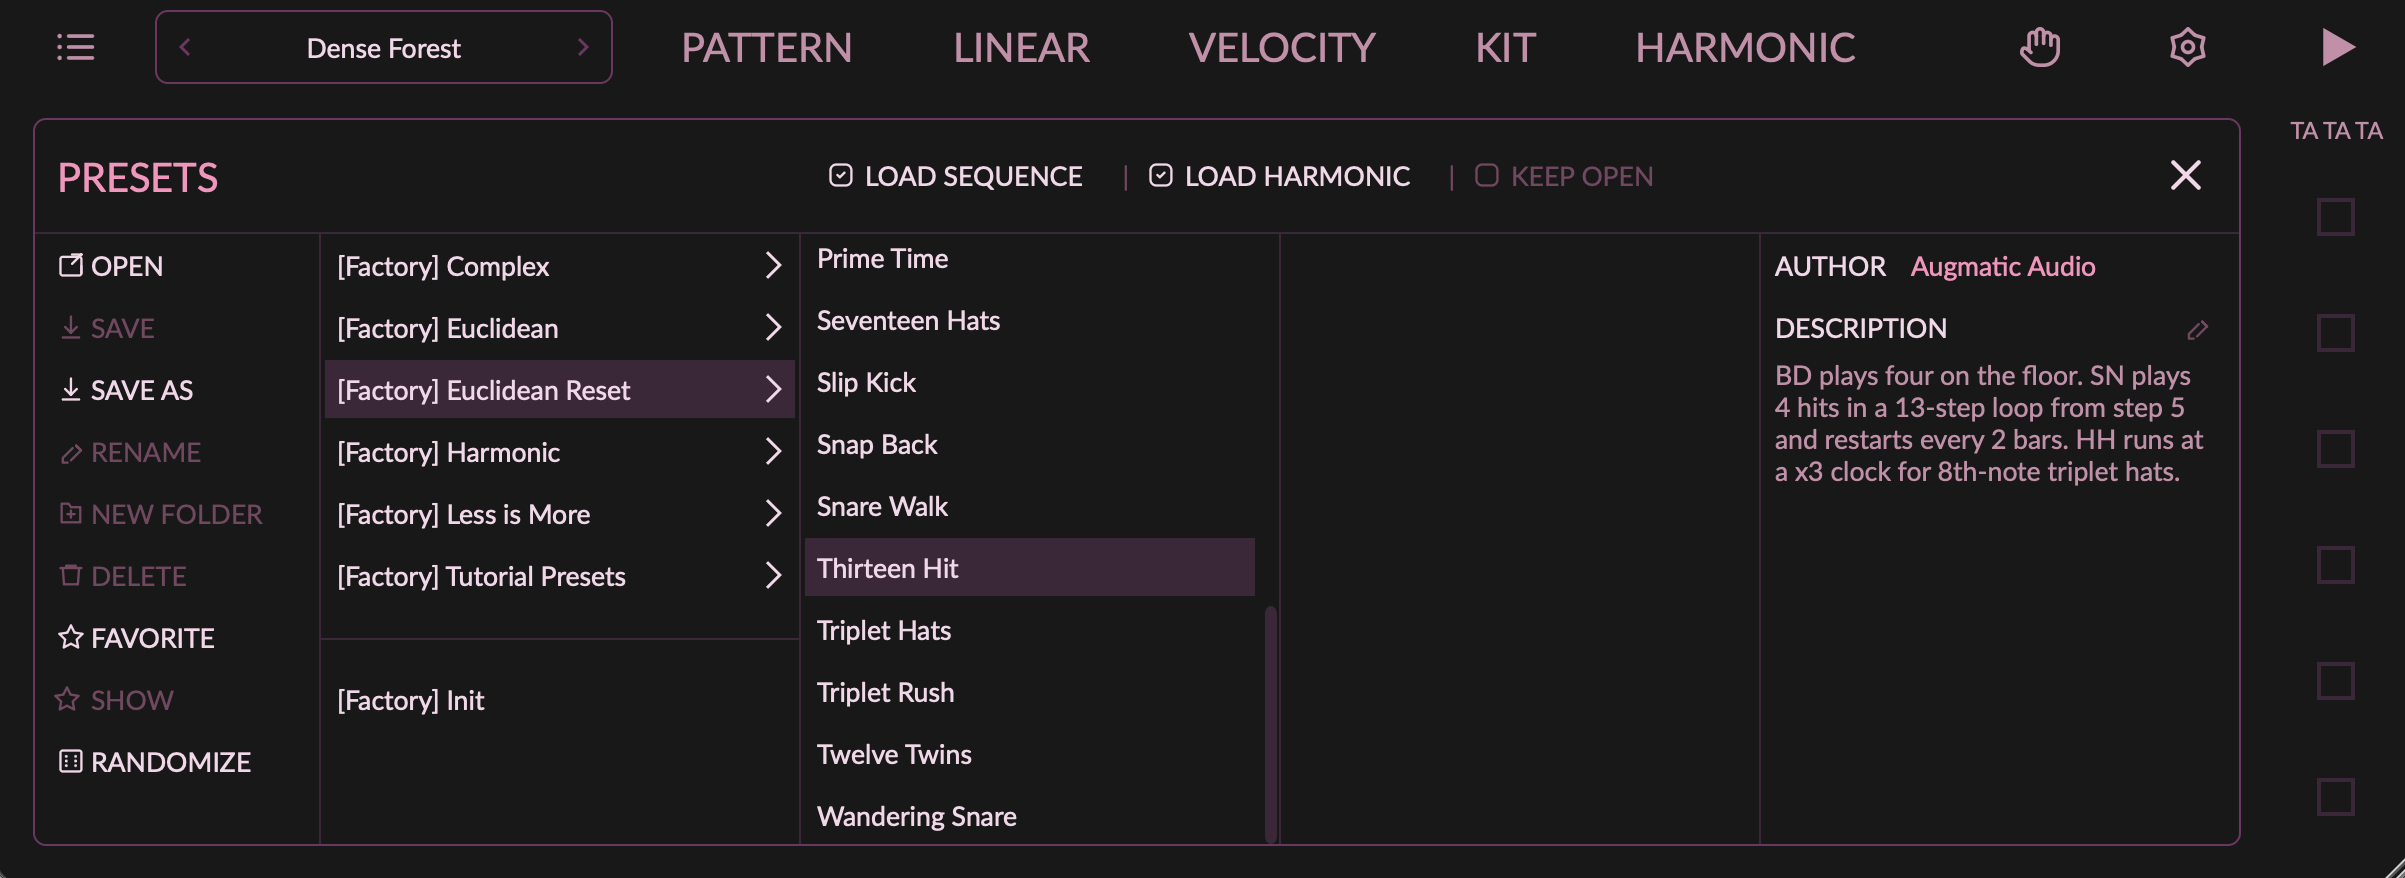
- OPEN — loads the selected preset.
- SAVE — overwrites the loaded preset.
- SAVE AS — saves to a new file. Enter the name in the header.
- RENAME — renames the selected file or folder.
- NEW FOLDER — creates a subfolder.
- DELETE — deletes the selected file or folder, after confirmation.
- FAVORITE — marks a file as favorite. SHOW FAVORITES lists only favorites.
- RANDOMIZE — sets random values for all parameters. The KIT never changes.
- AUTHOR and DESCRIPTION — tap to edit them for user presets.
KEEP OPEN keeps the browser open, so you can audition presets one after another.
The < / > arrows in the PRESET MENU load the previous or next preset in the folder.
Load Sequence & Load Harmonic
LOAD SEQUENCE and LOAD HARMONIC 2.0 load only one part of a preset.
- LOAD SEQUENCE — the drum part: PATTERN, LINEAR and VELOCITY.
- LOAD HARMONIC — the HARMONIC tab, including its OUTPUT routing.
Keep the rhythm and change chords and arpeggios, or change the rhythm and keep the harmony.
Routing in Presets
HARMONIC OUTPUT routing is saved in presets, separately for each platform — Standalone Port and MIDI Channel, desktop RCV and iPad/iPhone Port. One preset opens with the correct routing on every device. Drum AUX OUT routing is saved in KIT MAPPING files.
Factory and User Presets
- Factory presets ship with Augmatic GRE. You cannot change, rename or delete them.
- User presets are XML files. You can save, rename, delete and share them.
- An asterisk
*shows that the loaded preset has unsaved changes.
See FILE STORAGE for the preset folder on each platform.
What is Included in Presets and Kits
| Saved in PRESETS | Saved in KIT MAPPINGS — NOT in presets |
|---|---|
| TOPOGRAPHIC: DENSITY, CHAOS, MAP XY | NOTE |
| EUCLIDEAN: STEPS, RESET, PULSES, START ON | LENGTH |
| BLEND, SWING, SHIFT, HUMANIZE, CLOCK | NOTE OFF |
| VELOCITY: LEVEL, RANDOM, BYPASS, VELOCITY BENDER | AUX OUT |
| LINEAR: PROB, MUTE, BYPASS, LINEAR DRUMMING, SOLO | ACTIVE KIT |
| HARMONIC: SHAPE, LOCK, HARMONIC DRUMMING, OCTAVE, LENGTH, OUTPUT, HOLD | CHANNEL NAME, PAD MODE |
HUB/RCV Plugins
HUB and RCV 2.0 are companion plugins that send each Augmatic GRE channel to its own DAW track.
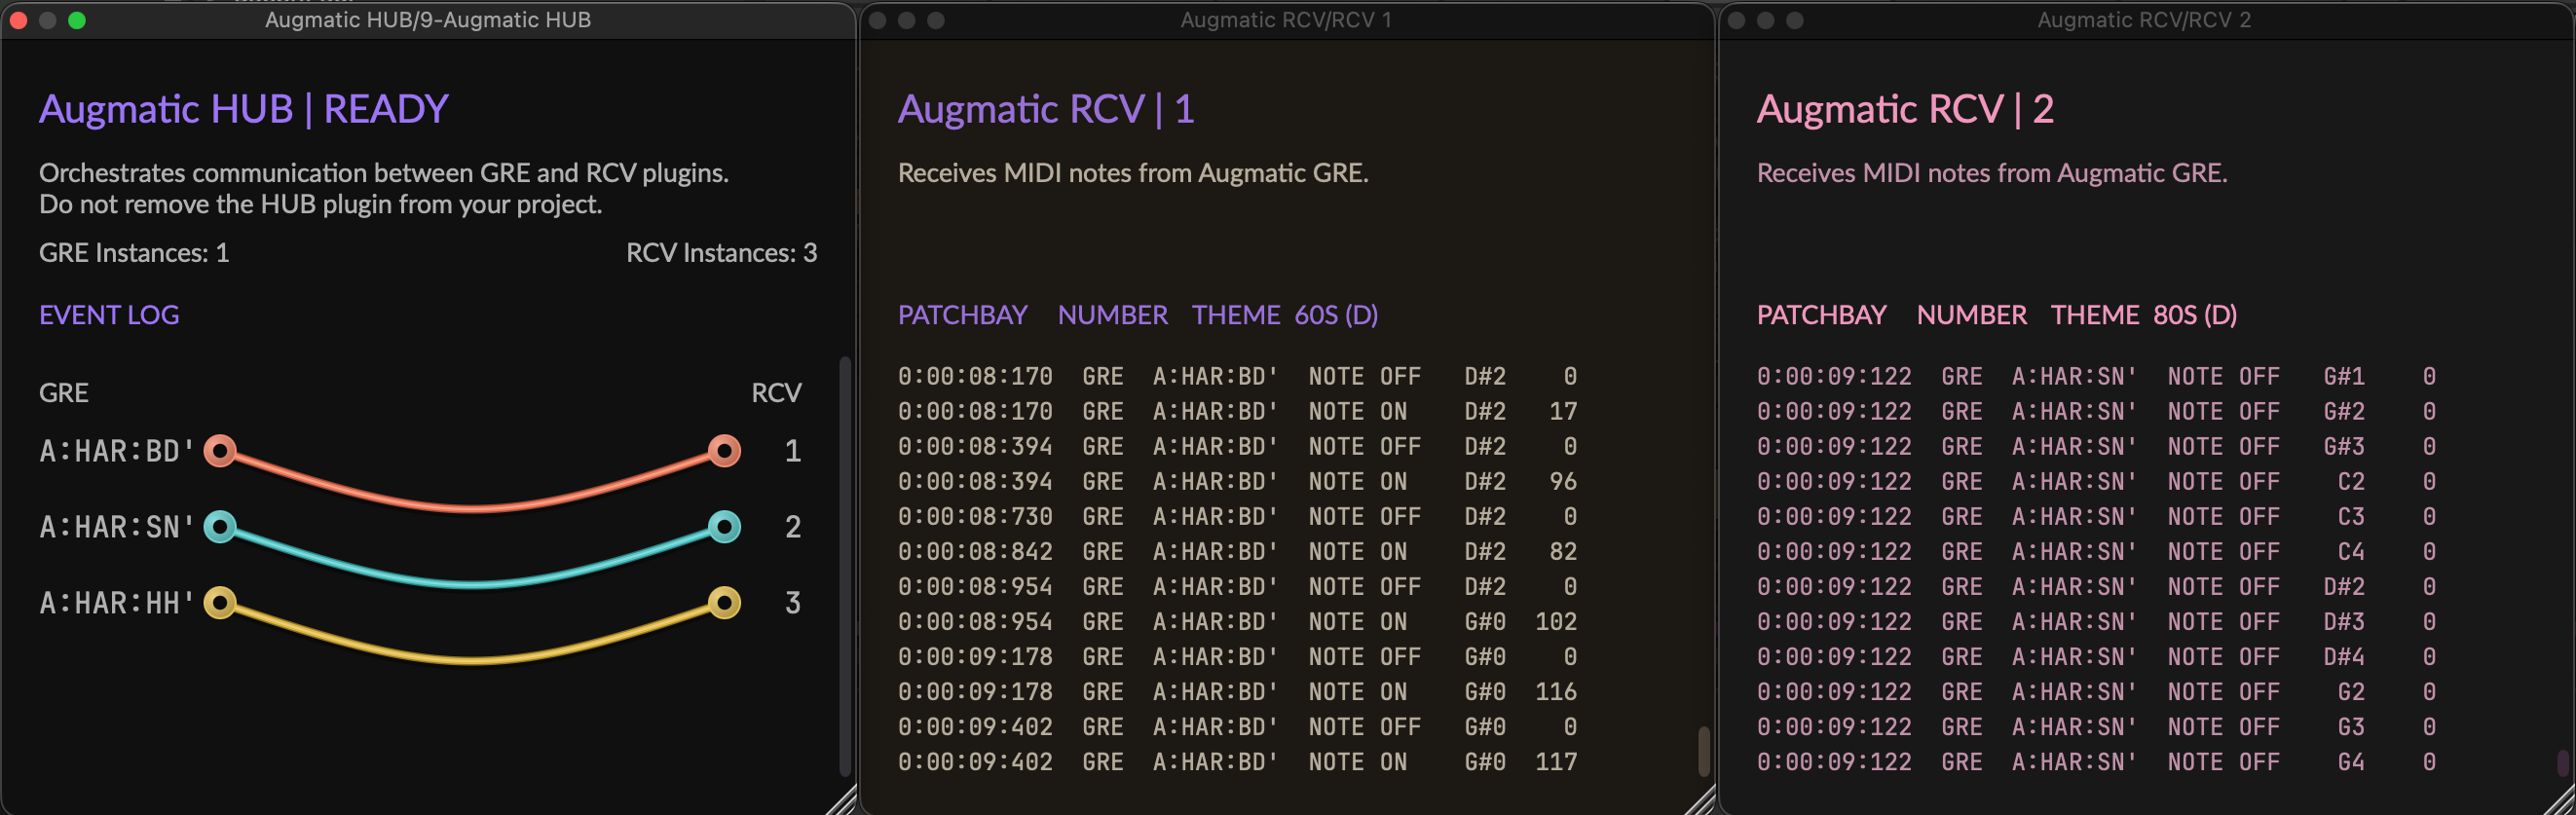
Use them only in desktop DAWs such as Ableton Live, Bitwig, Cubase and Logic Pro. The STANDALONE APP and iPad/iPhone DAWs do not need them.
- DRUM channels — play each sound on a different instrument, for example a sampler for the kick and a synth for the snare.
- HARMONIC channels — send arpeggios, chords, basslines and melodies to separate tracks and instruments.
Select an RCV in KIT → AUX OUT or HARMONIC → OUTPUT.
Multiple Instances in DAW
- Up to six Augmatic GRE instances per project. Each shows a letter
A–Fin its header and keeps it after reopen. - One HUB per project. Load it on its own track and leave it there.
- Up to 36 RCV instances. Each receives notes from one or more GRE channels, also from several GRE instances.
IMPORTANT: Do not remove the HUB from your project. The HUB remembers all GRE–RCV connections and restores them when you open the project. Without it, the connections are lost.
Give each GRE and RCV instance a different THEME to tell them apart.
HUB Plugin Window
The title bar shows the HUB state, for example Augmatic HUB | READY or 2ND HUB, DELETE IT!.
- EVENT LOG — a timestamped list of
REGISTERED/RELEASEDinstances andCONNECTED/DISCONNECTEDroutes, e.g.GRE A:HAR:SN CONNECTED RCV 1. You can copy it. - PATCHBAY — a live map of cables between GRE channels and RCV plugins, in channel colours. Hover over a GRE outlet to highlight its cable.
RCV Plugin Window
Each RCV has its own event log and patchbay. The patchbay jacks flash on incoming notes. The title shows the RCV number, LOOKING FOR HUB while it connects, and HUB IS MISSING after ~10 s without a HUB.
UDP Communication
GRE, HUB and RCV talk over UDP on localhost — a common method for fast messages between programs on one computer, also used by Max/MSP, Pure Data and OSC. No data leaves your computer.
The plugins use UDP ports 19610–19696. Aggressive security software can block these ports. If that happens, allow the ports in your security software. Check the connection with SETTINGS → UDP TEST.
Standalone App
The STANDALONE APP runs Augmatic GRE without a DAW, with its own clock and MIDI routing.
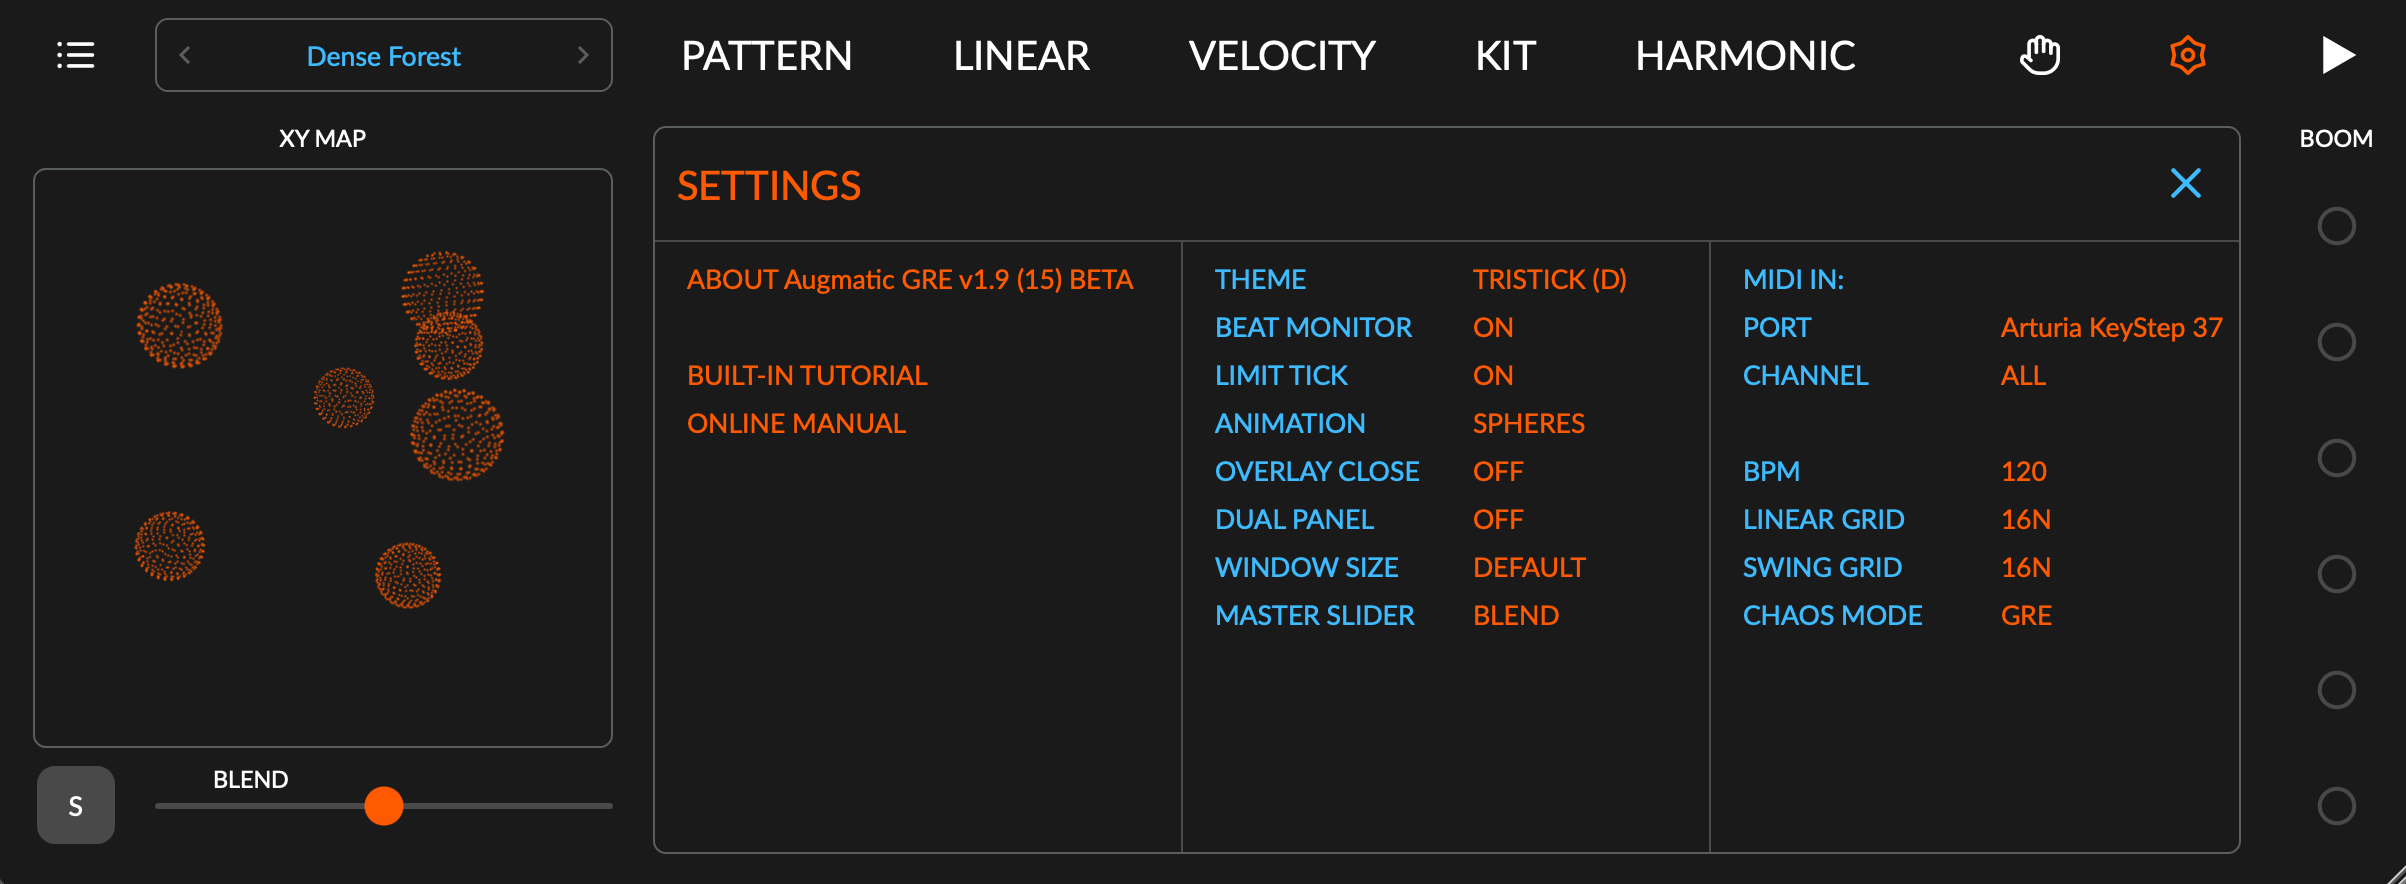
The STANDALONE APP runs on Windows, Mac, iPad and iPhone. At launch it creates the DRUMS and six GRE 1..6 virtual output Ports, plus a GRE Input Port. On Windows, this needs Windows 11 25H2 or newer. See MIDI OUTPUTS IN STANDALONE APP.
The STANDALONE APP is enough to play one drum sampler or synth. For several instruments in sync, use a host app which manages the clock and MIDI.
Plugin vs Standalone
| Feature | Plugin (VST3 / CLAP / AU / AUv3) | Standalone App |
|---|---|---|
| Transport | DAW Play/Stop and song position | / button in the top row; Spacebar (Mac) |
| BPM | From the DAW | SETTINGS, 40–240 |
| MIDI input | Routed by the DAW | MIDI IN Port and Channel in SETTINGS |
| MIDI output | Plugin MIDI output; RCV or AUv3 Ports per channel | Any MIDI Port and Channel per channel, in AUX OUT and OUTPUT |
| DAW automation | All automatable parameters | Not available |
The STANDALONE APP remembers each routing by device name and reconnects it automatically.
File Storage
Presets, KIT MAPPINGS and THEMES are XML files, in separate Factory and User folders.
Updates of Augmatic GRE never change or delete the files in your User folders. To import a file someone shared with you, copy it into the correct User folder.
Windows
Plugins and app install to Program Files. Your files live in Documents:
- VST3 Plugin:
C:\Program Files\Common Files\VST3\ - CLAP Plugin:
C:\Program Files\Common Files\CLAP\ - Standalone App:
C:\Program Files\Augmatic Audio\Augmatic GRE\ - Factory Presets:
Documents\Augmatic Audio\Augmatic GRE\Presets\Factory\ - User Presets:
Documents\Augmatic Audio\Augmatic GRE\Presets\User\ - Factory Kit Mappings:
Documents\Augmatic Audio\Augmatic GRE\Kit Mappings\Factory\ - User Kit Mappings:
Documents\Augmatic Audio\Augmatic GRE\Kit Mappings\User\ - Factory Themes:
Documents\Augmatic Audio\Augmatic GRE\Themes\Factory\ - User Themes:
Documents\Augmatic Audio\Augmatic GRE\Themes\User\
Mac
Plugins and app install to the standard system folders. Each plugin folder holds Augmatic GRE together with HUB and RCV. Your files live in your user Library:
- Standalone App:
/Applications/Augmatic GRE.app - Audio Unit:
/Library/Audio/Plug-Ins/Components/ - VST3 Plugin:
/Library/Audio/Plug-Ins/VST3/ - CLAP Plugin:
/Library/Audio/Plug-Ins/CLAP/ - Factory Presets:
~/Library/Application Support/AugmaticGRE/Presets/Factory/ - User Presets:
~/Library/Application Support/AugmaticGRE/Presets/User/ - Factory Kit Mappings:
~/Library/Application Support/AugmaticGRE/KIT Mappings/Factory/ - User Kit Mappings:
~/Library/Application Support/AugmaticGRE/KIT Mappings/User/ - Factory Themes:
~/Library/Application Support/AugmaticGRE/Themes/Factory/ - User Themes:
~/Library/Application Support/AugmaticGRE/Themes/User/
iPad/iPhone
Your files live in the app's Documents folder. Open them in the Files app under On My iPad > Augmatic GRE:
- Factory Presets:
On My iPad/Augmatic GRE/Presets/Factory/ - User Presets:
On My iPad/Augmatic GRE/Presets/User/ - Factory Kit Mappings:
On My iPad/Augmatic GRE/Kit Mappings/Factory/ - User Kit Mappings:
On My iPad/Augmatic GRE/Kit Mappings/User/ - Factory Themes:
On My iPad/Augmatic GRE/Themes/Factory/ - User Themes:
On My iPad/Augmatic GRE/Themes/User/
The AUv3 plugin needs ENABLE FILES APP ACCESS once, to share these folders with the app and the Files app. Without it, the AUv3 still works, but saves to an internal folder that the Files app does not show.